Tutorials
- USER GUIDES & VIDEO TUTORIALS
- ALL VIDEO TUTORIALS
- OVERVIEW
- ASSETS
- CREATE COURSE
- Getting Started with Creating Courses
- Create Course - Course Settings
- Course Builder (TOC)
- Get Started with Course Builder
- Sections and Lessons
- Add an Assignment
- Grading Assignments
- Create a Quiz
- Types of Quiz Questions
- Build Lessons
- Tool Settings
- Row Effects
- MANAGE COURSES
- MANAGE TEMPLATES
- MANAGE XAPI
- ADMIN
- ACCOUNT
Sections and Lessons
SECTIONS AND LESSONS
ADD SECTIONS
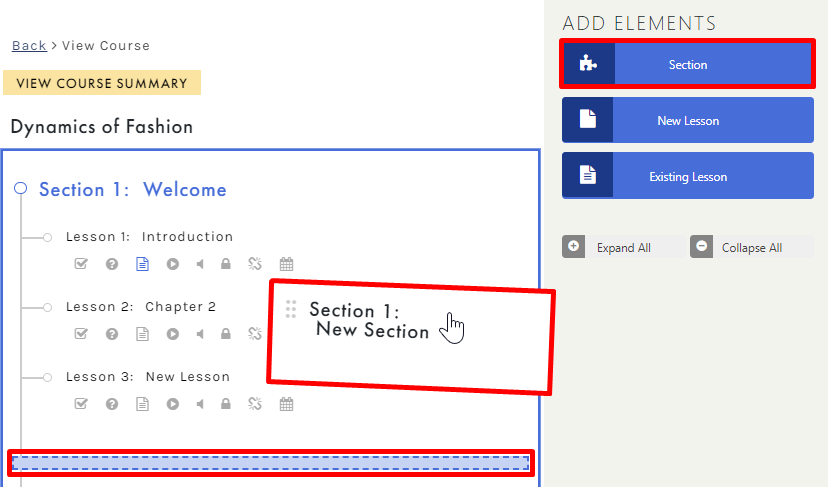
- CLICKING THE SECTION BUTTON: From the Course Builder window, locate the ADD ELEMENTS panel (far right) and click the SECTION button:

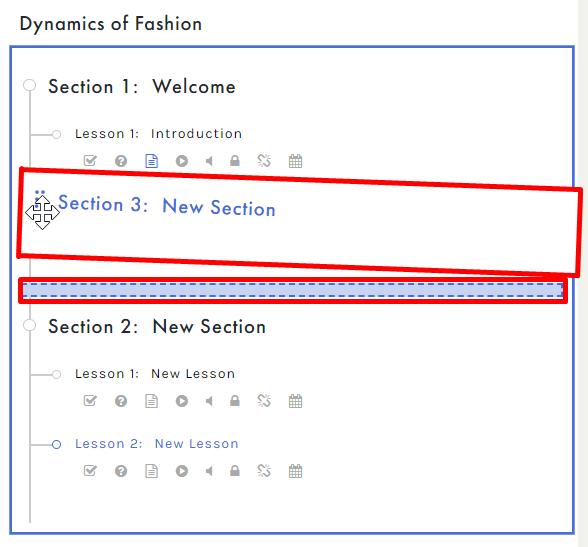
- DRAGGING AND DROPPING A NEW SECTION: From the Course Builder window, locate the ADD ELEMENTS panel (far right) and drag the SECTION button over the main Course Builder screen. As you drag, a blue guide will appear, marking spots where you can drop this item on the TOC:
NEW LESSONS
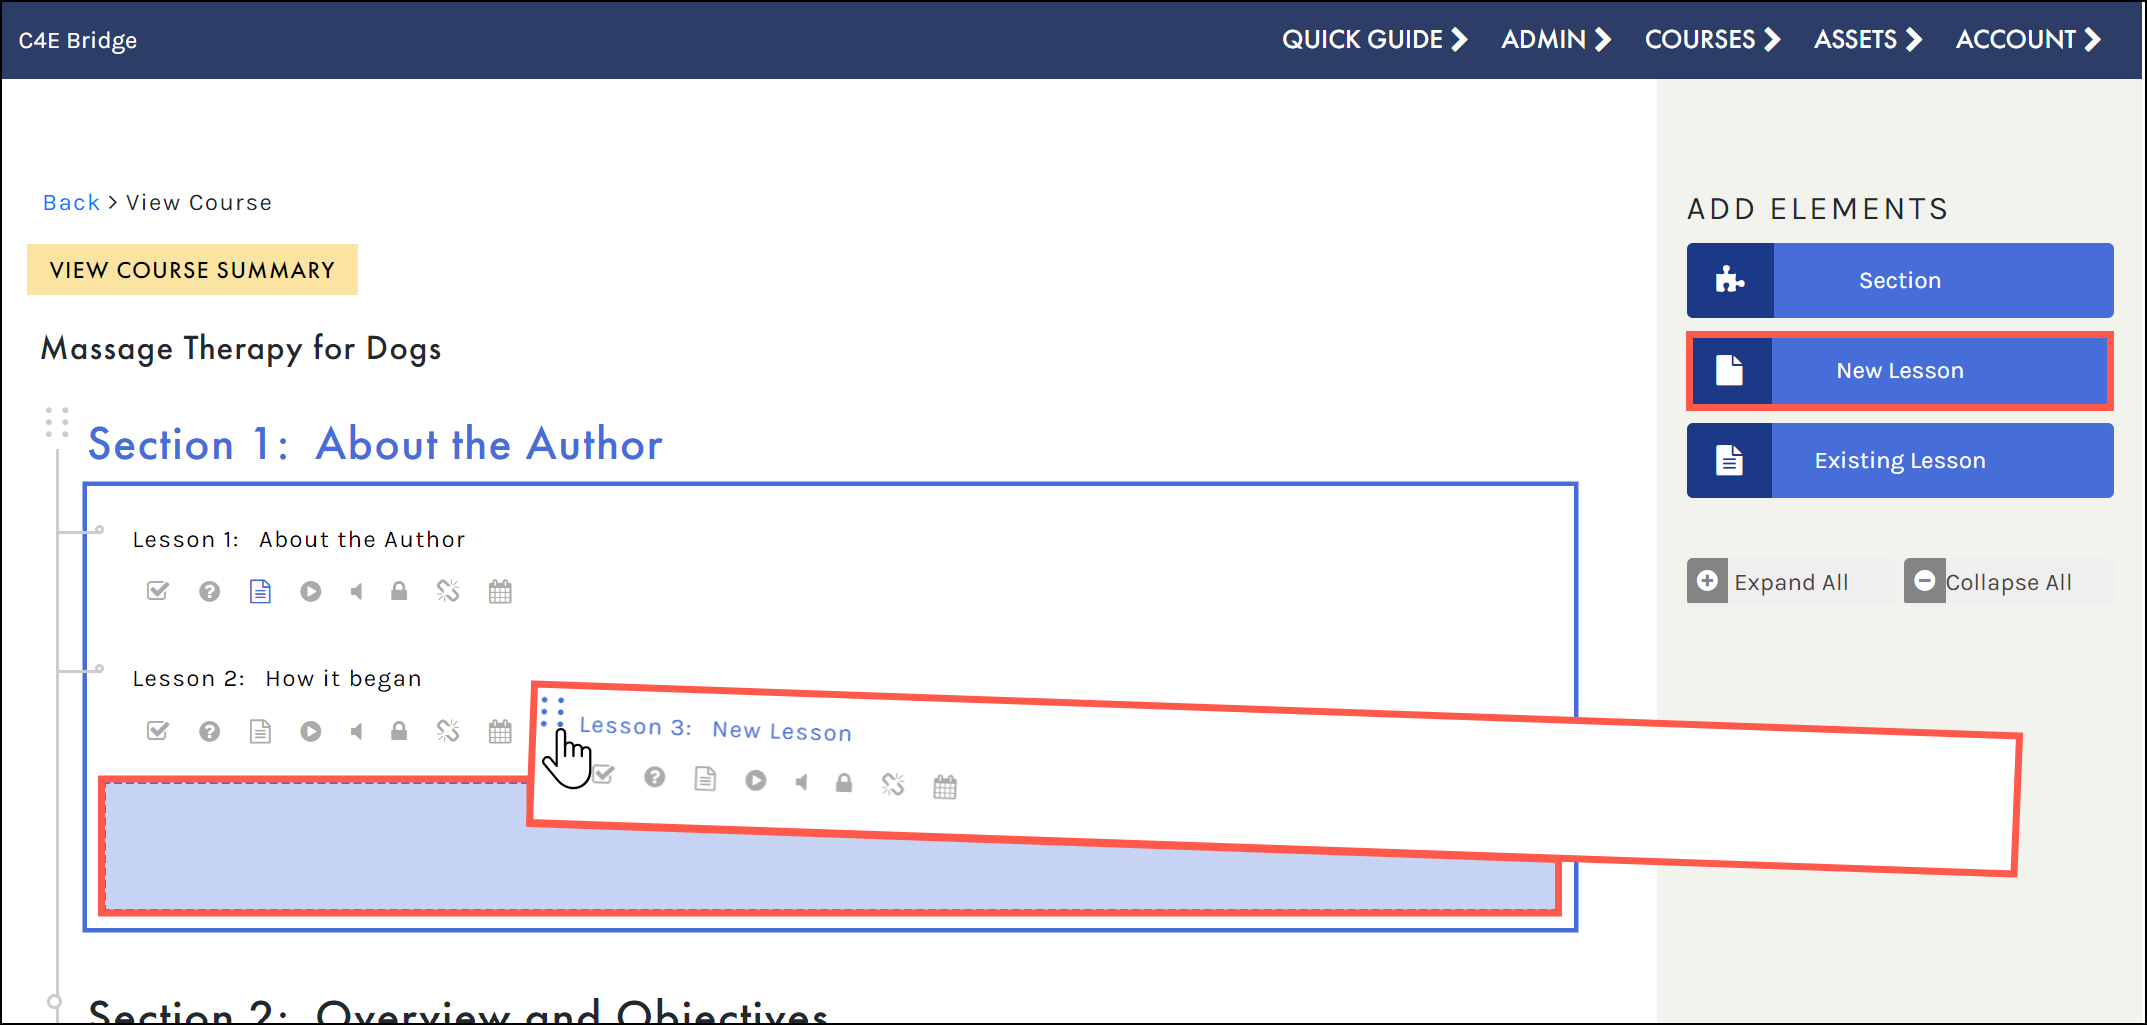
- CLICKING THE NEW LESSON BUTTON: From the Course Builder window, locate the ADD ELEMENTS panel (far right) and click the NEW LESSON button:
A new lesson added via the NEW LESSON button will be placed at the end of the currently active section (an active section is indicated by blue text in the section title). If no sections are active, the new section will be added to the end of the last section in the course. To activate a section, click on SECTION in that section’s title.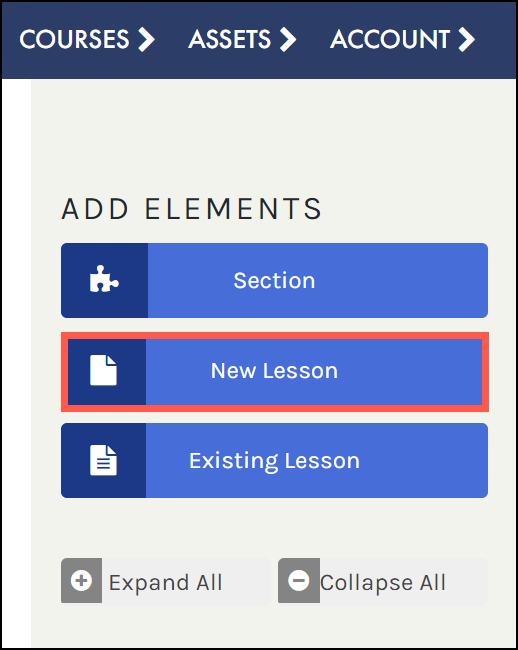
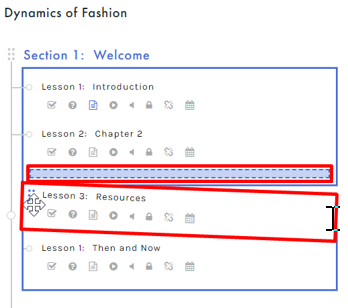
- DRAGGING AND DROPPING A NEW LESSON: From the Course Builder window, locate the ADD ELEMENTS panel (far right) and drag the NEW LESSON button over the main Course Builder screen. As you drag, a blue guide will appear, marking spots where you can drop this item on the TOC:
EXISTING LESSONS
 Existing lessons have either been detached or have been created under All Lessons. For more information on All Lessons, visit the All Lessons section.
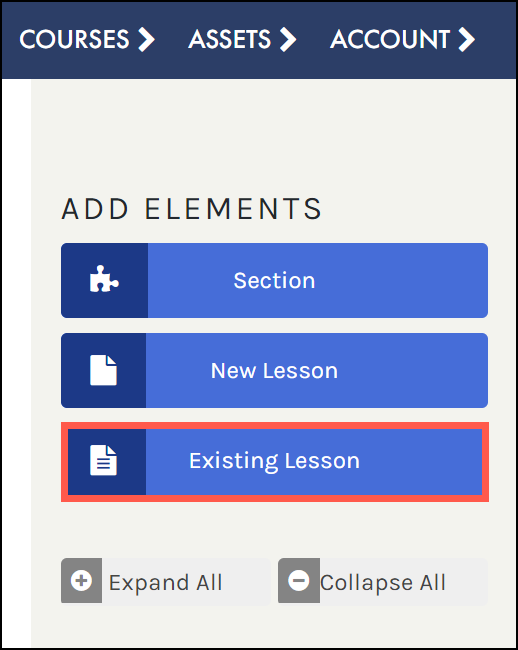
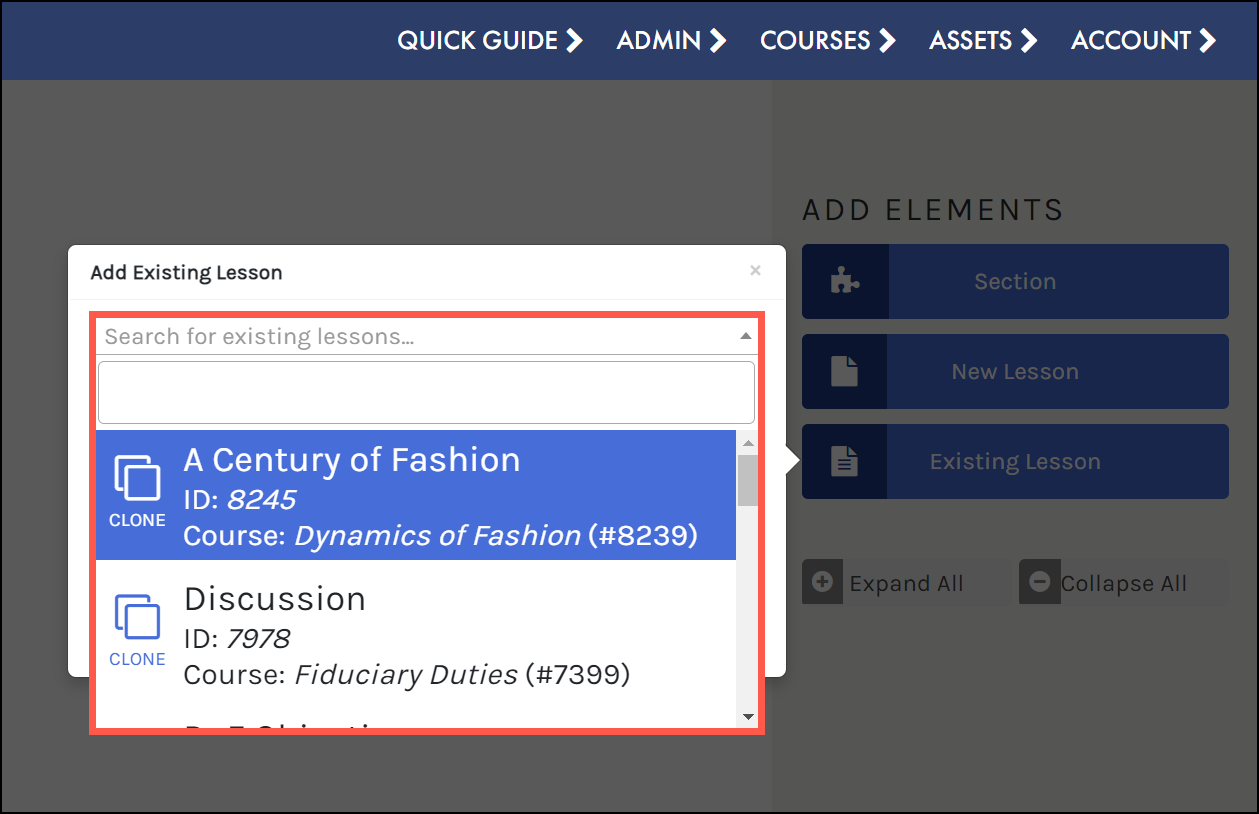
 If you do not see the ‘attach’ option it is because none of your lessons are detached.
ORGANIZING SECTIONS AND LESSONS
EDITABLE TITLES
As you create new sections and lessons using the ADD ELEMENTS panel on the Course Builder screen, these items will appear on your TOC with generic titles of NEW SECTION or NEW LESSON. Clicking on this default text allows you to easily modify and customize your titles: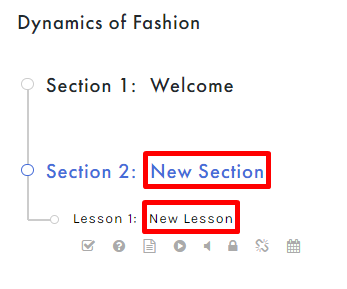
You can change the title names but without customized coding, it is not possible to change Section and Lesson names for example Section 1, Lesson 1.
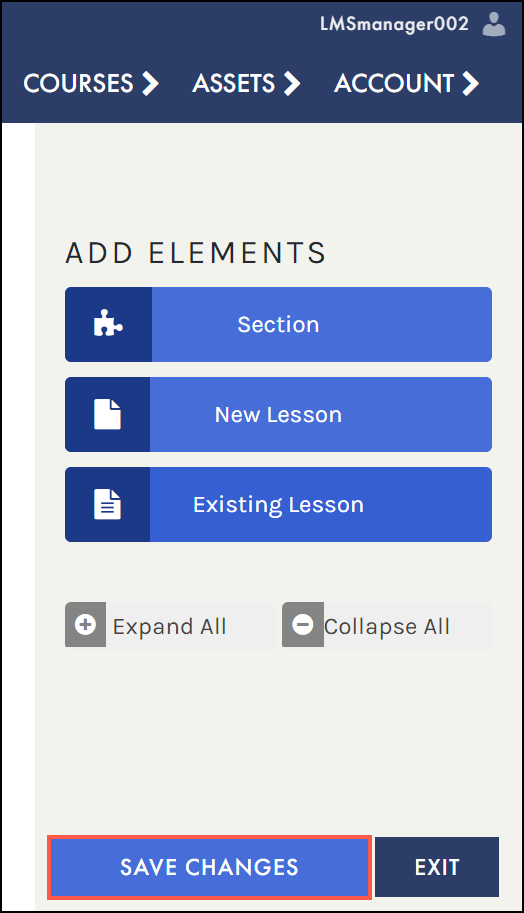
SAVE CHANGES
- Saved indicates all changes have been successfully saved. In this state the Indicator button is disabled.
- Save Changes indicates there are changes that have not been saved. In this state you can click the indicator button to save your changes. If you wait, the unsaved changes will be automatically saved during the next Heartbeat Tick (more than likely within 30 seconds)
- Saving Changes indicates that data is currently being saved.
 The system is not currently set up to automatically save changes. Please ensure you save changes as you make any new updates to your courses.
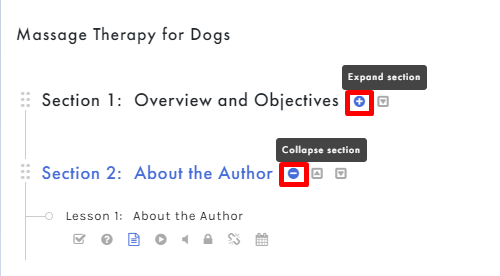
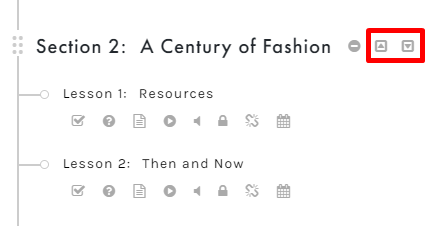
EXPAND AND COLLAPSE

MOVING SECTIONS AND LESSONS
DELETING SECTIONS AND LESSONS
Sections must be empty before they can be deleted. In order to delete a section, you must first delete all of its lessons.
 In order for a section to be deleted, not only do the contents in the section need to be deleted but the section must also be in the expanded position to see the delete icon.
 Deletion of sections and lessons is permanent. Any deleted content is removed from the database and cannot be recovered.
DETACHING ELEMENTS
 Detached Lessons are moved into the LESSONS area ( COURSES > MANAGE COURSES > LESSONS ). Editing lessons can be done from the LESSONS area. To learn how to add a detached lesson to another course, visit the Existing Lessons section.
LESSON TOOLS

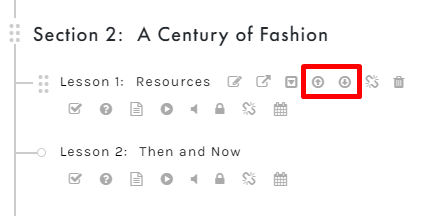
RIGHT-HAND TOOL ICONS
The right-hand tool icons offer several important functions to help you manage your course lessons. These tool icons are as follows:- Open Lesson Settings: Opens the Edit Lesson Settings page, allowing you to make changes to the lesson settings.
- *View/Edit Lesson: This tool opens the Lesson Editor for this lesson. The Lesson Editor will open in a new tab.
- Shift up and Shift down: These options move your lesson up or down one within this section.
- Move to previous section: Repositions your lesson so that it is the last lesson in the previous section.
- Move to next section: Repositions your lesson so that it is the last lesson in the next section.
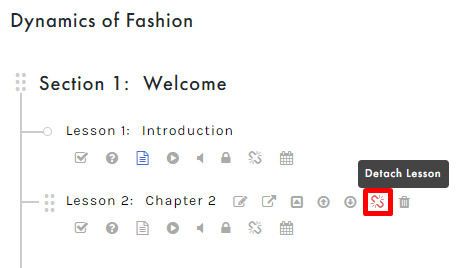
- **Detach Lesson: Detaches this lesson from the course.
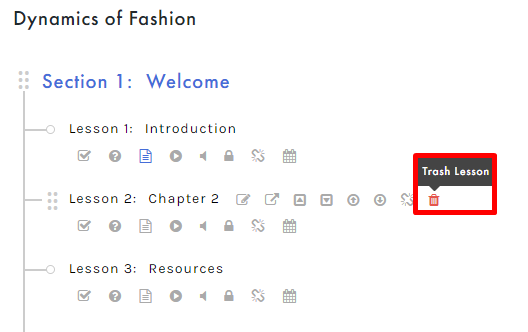
- Trash Lesson: This tool permanently deletes your lesson.
*To learn more about the Lesson Editor, visit the Lesson Settings Section.
**Detached Lessons are moved into the LESSONS area ( CREATE COURSE > BUILD LESSONS > LESSONS SETTINGS). Editing lessons can be done from the Lessons area. To learn more about managing all lessons go to the Editing Lessons Section.
STATIC TOOLS BELOW LESSON TITLES
The static tools are located beneath any of the lesson titles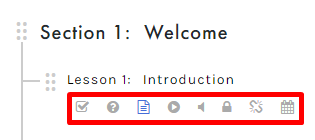
-
- Add an assignment: Allows you to add an assignment to your lesson from the Course Builder window. If this icon is blue, this indicates that there are assignments in this lesson (a gray icon indicates there are no assignments). Upon clicking this icon, a side panel appears to the right of the screen, allowing you to create a new assignment or add an existing one.
To learn more about creating assignments, visit the Add Assignment section.
-
- Add a quiz: Allows you to add a quiz to your lesson from the Course Builder window. If this icon is blue, this indicates that there are quizzes in this lesson (a gray icon indicates there are no quizzes). Upon clicking this icon, a side panel appears to the right of the screen, allowing you to create a new quiz or add an existing one
To learn more about creating quizzes, visit the Add Quiz section to learn more.
- Content: Displays whether your lesson contains any content. If this icon is blue, this indicates that there is content in this lesson (a gray icon indicates there is no content).
- Video: Displays whether your lesson contains any videos. If this icon is blue, this indicates that there are videos in this lesson (a gray icon indicates that there are no videos).
- Audio: Displays whether your lesson contains any audio tracks. If this icon is blue, this indicates that there are audio tracks in this lesson (a gray icon indicates that there are no audio tracks).
- *Enrolled Students Only: Indicates whether this lesson can be accessed by enrolled students only. If the icon is blue, this indicates that non-enrolled students cannot access this lesson.
- *Prerequisites: Indicates whether this lesson has any prerequisites. If this icon is blue, this indicates that this lesson has prerequisites (a gray icon indicates no prerequisites).
- *Drip: Indicates whether drip is enabled. If this icon is blue, this indicates that this lesson has drip enabled (a gray indicates that drip is not enabled).
*To learn more about Enrolled Students Only, Prerequiistes, and Drip visit the Edit Lesson Settings section.