EDIT COURSE SETTINGS OVERVIEW
The following section outlines the course creation process, guiding you through the creation of a new course and the editing of your course settings.
To begin the process of creating a new course from scratch, select
COURSES > MANAGE COURSE, and click the
CREATE COURSE button:

 You can also create a new course from the Manage Courses page .
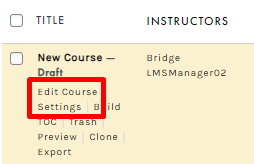
The image above is from the LMS Manager view, which features more editing rights than the Instructor role. The Instructor role has fewer permissions, Instructors will not see all of these options.
SCREEN OPTIONS
On the
CREATE COURSE screen, you may use the
SCREEN OPTIONS menu (top right corner) to customize this screen, allowing you to select and modify which options and columns to display. Any modifications made in the
SCREEN OPTIONS panel will then reflect in the windows below, allowing you to hide or include any options you would like. For example, you can hide ‘Access Plans’ if you do not want to include this during the building of your new course.
To modify your Screen Options, expand the
SCREEN OPTIONS menu in the top right of the
CREATE COURSE screen. Select/deselect any Boxes you wish to include/exclude, modify your layout format, and enable any additional settings as desired:
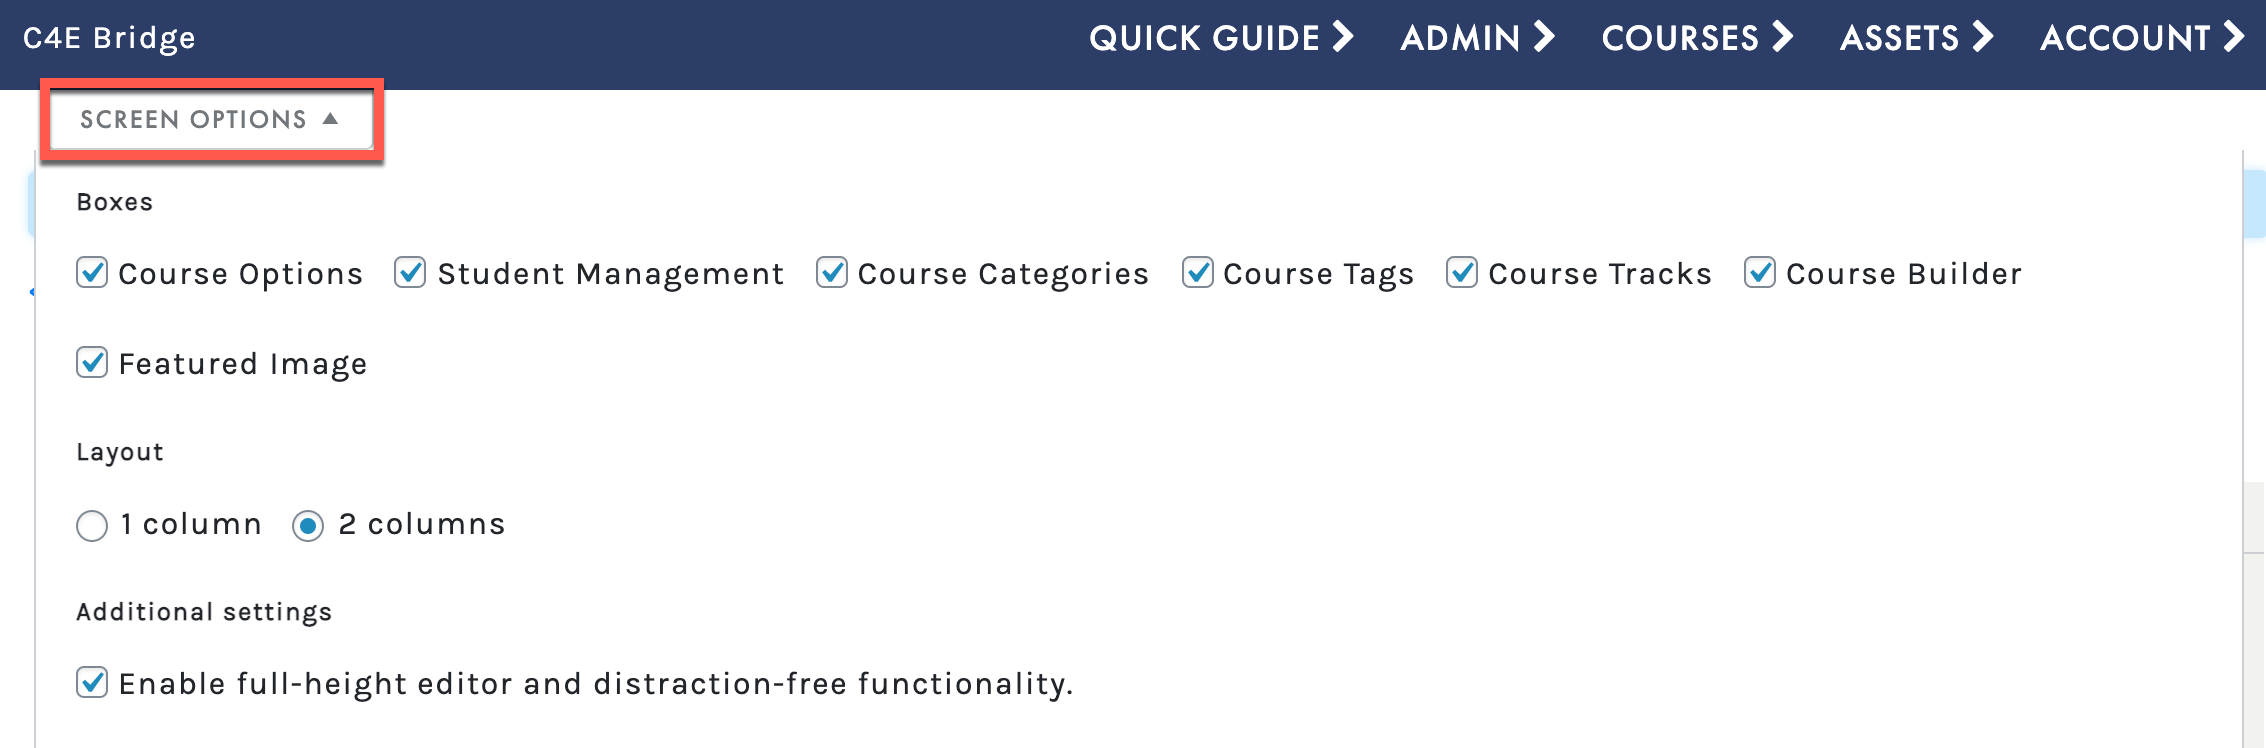
Once your changes are complete, click to collapse the SCREEN OPTIONS menu again. Any modifications made to the Screen Options will impact the appearance of the CREATE COURSE screen.
ADD A COURSE TITLE & DESCRIPTION
Once you have modified your screen Options per your preferences, you can proceed with adding a course title and description. Your course description will display on the
COURSE INFORMATION screen and is typically used as an overview of the entire course:

Add your title in the
ENTER COURSE TITLE HERE field:
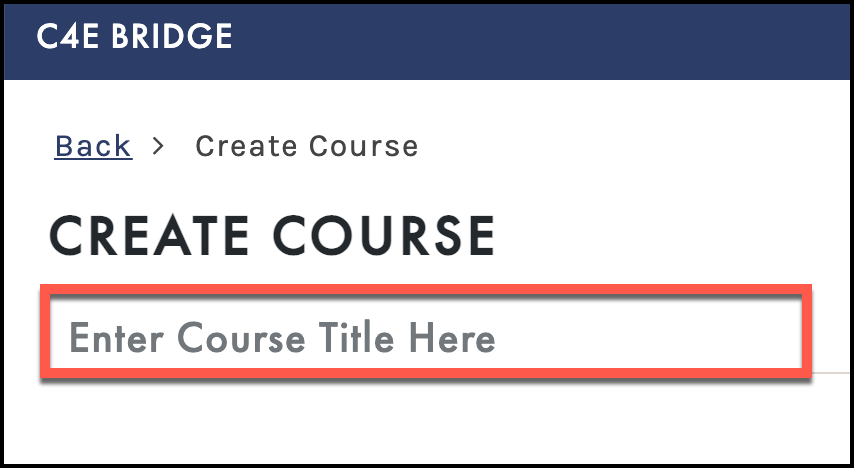
Once you have entered your title, the course permalink will appear. The permalink is the URL that will be displayed on the COURSE INFORMATION screen and can be easily edited by selecting the EDIT button.
Enter your course description:
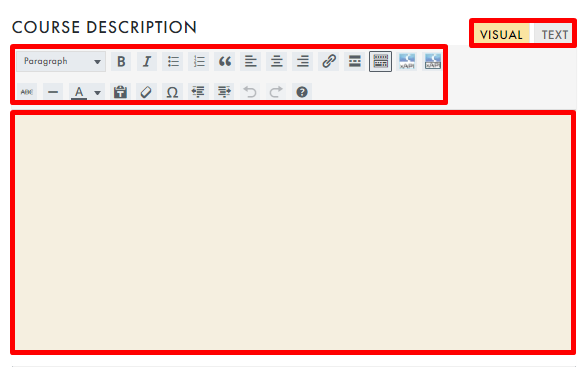
By default, you will be in the
Visual editor, which offers a simplified editor (to enter HTML code, simply toggle to the advanced
Text editor). Use the editor toolbar and buttons to make any needed adjustments to your description.
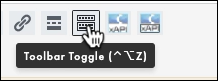
To display all tools in the text editor, select the TOOLBAR TOGGLE button:
After entering a course title and description, you may save your draft (or publish or preview) using the
Publish panel to the right:
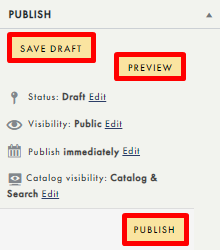
To learn about the Publish panel, go to the Publish Panel section.
 When making changes to your course settings, be sure to save your progress by accessing the Publish panel and selecting SAVE DRAFT (or UPDATE, for courses that have already been published). We also recommend performing this step periodically to help save your work as you go. To learn about the Publish panel, go to the Publish Panel section.
INSERT xAPI PACKAGES
C4E
Bridge allows you to upload Experience API (or xAPI, also known as Tin Can) packages to your Course Description panel.
xAPI packages are courses that have been created using Articulate (Storyline and RISE), Adobe Captivate, iSpring, and Lectora. C4E
Bridge xAPI allows you to send as little or as much reporting data to a Learning Record Store (LRS) as you wish.
To learn about the xAPI, go to the xAPI section.

If using an xAPI package on the COURSE INFORMATION screen, a best practice is to use it as an introduction to the course (not for the main content).
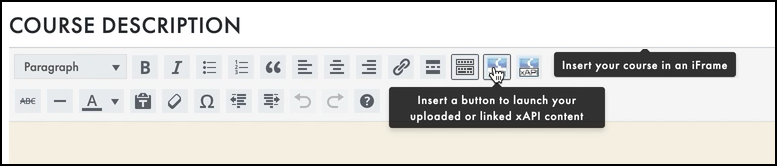
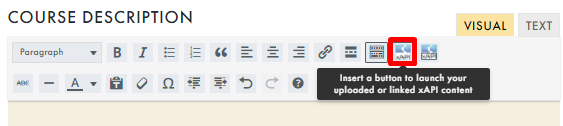
xAPI packages can be easily added from the
EDIT COURSE SETTINGS > COURSE DESCRIPTION area by either: 1. Inserting a button to launch your uploaded or linked xAPI content, or 2. Inserting your course in an iFrame. Both of these methods will allow you to display the xAPI package on your
COURSE INFORMATION page. The process required for each of these options is outlined below.
Before you can add an xAPI package to your course description, it must first be uploaded to your Bridge by an LMS Manager (only LMS Managers can upload xAPI packages). Uploading the xAPI package is covered in xAPI Content section
xAPI Button Settings
To add an xAPI package to your course via a button, from
COURSES > MANAGE COURSES, access your course’s
EDIT COURSE SETTINGS screen:
From the
Course Description panel, select to add the xAPI package as a button:
From the
CREATE xAPI LAUNCH BUTTON SHORTCODE menu, you can:
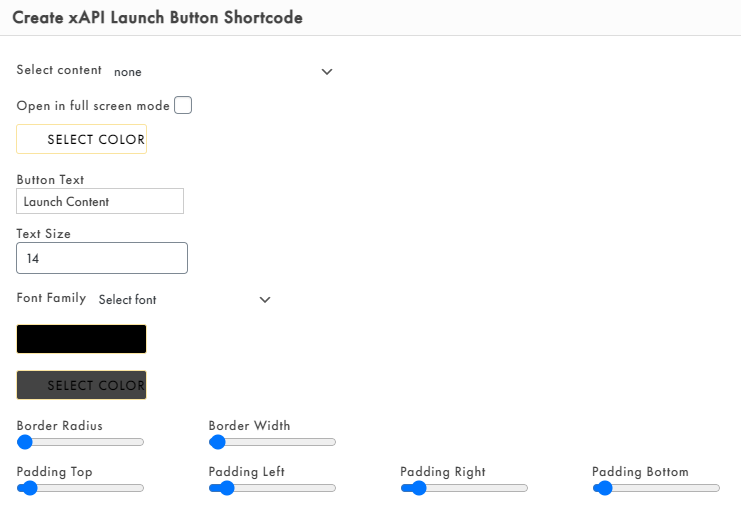
- Choose your xAPI package from the SELECT CONTENT dropdown
- Choose whether to open the xAPI package in full screen mode.
- Modify the appearance and text of the button
Once your changes are complete, select
INSERT (bottom right corner) to return to the
EDIT COURSE SETTINGS screen, where you may save your draft (or publish or preview) using the
Publish panel to the right:
To learn about the Publish panel, go to the Publish Panel section
xAPI iframe Settings
To add an xAPI package to your course via an iFrame, from
COURSES > MANAGE COURSES, access your course’s
EDIT COURSE SETTINGS screen:
From the
Course Description panel, select to add the xAPI package in an iFrame:
From the
CREATE xAPI IFRAME menu, you can:
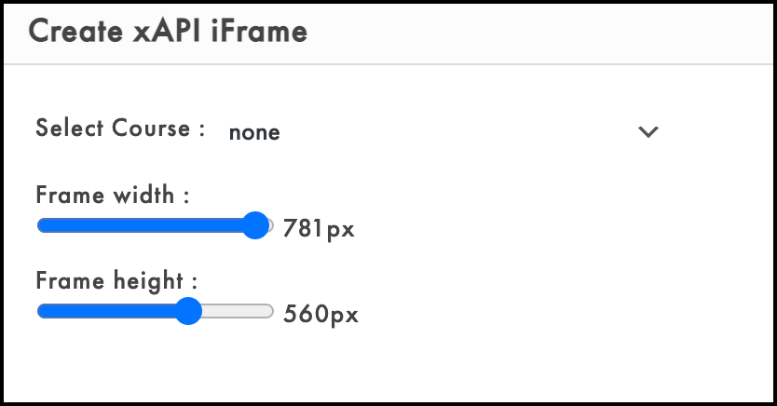
- Select your xAPI package from the SELECT COURSE dropdown
- Use the slider to adjust the Frame width.
- Use the slider to adjust the Frame height.
Once your changes are complete, select
INSERT (bottom right corner) to return to the
EDIT COURSE SETTINGS screen, where you may save your draft (or publish or preview) using the
Publish panel to the right:
To learn about the Publish panel, go to the Publish Panel section
Advantages and Disadvantages of xAPI on the Course Summary Page
Advantages & Disadvantages of Adding xAPI Packages to your Course Information screen
Advantages
xAPI packages help make your
COURSE INFORMATION screen more visually appealing, adding personality and style to your page. RISE courses in particular can enhance visual appeal when embedded as an iFrame as it covers the full screen.
We recommended to only use xAPI packages within section EDIT COURSE SETTINGS to serve as an introduction and not as the main content.
To learn how to add xAPI packages within as content within Lesson Editor, go to the LESSON EDITOR section.
Disadvantages
One of the disadvantages of adding an xAPI package on the
COURSE INFORMATION screen is that users will not have a
MARK COMPLETE button, because within the Course Information page, the xAPI package is not considered content.
Another thing to keep in mind is that when if adding an xAPI package as a button, learners will have to click twice to enter the course.