Tutorials
- USER GUIDES & VIDEO TUTORIALS
- ALL VIDEO TUTORIALS
- OVERVIEW
- ASSETS
- CREATE COURSE
- MANAGE COURSES
- MANAGE TEMPLATES
- MANAGE XAPI
- ADMIN
- Getting Started with Administrative Tasks
- Reporting
- Vouchers
- Users
- Forums
- Engagements
- Engagements
- All Engagements
- Achievements
- All Achievements
- Certificates
- All Certificates
- Emails
- All Emails
- Memberships
- ACCOUNT
Emails
EMAILS
OVERVIEW
 Emails are for Premier and Enterprise account holders.
C4EBridge can send emails directly from your server via notifications and engagements.
In the broadest sense, notifications are global in nature, whereas engagements are specific in nature.
For example, you can send a purchase receipt email notification to the customer automatically no matter what course or membership they purchase. However, you could send a personalized email engagement with a specific message when someone completes Course A.
To learn more about Notification emails, view the article on Notification Settings
- Student creates a new account,
- Student enrolls in a specific course
- Student purchases a specific course
- Student completes a specific course
- Student completes a specific lesson
- Student completes a specific quiz
- Student passes a specific quiz
- Student fails a specific quiz
- Student completes a specific section
- Student completes a specific course track
- Student enrolls in a specific membership
- Student purchases a specific membership
CREATE NEW EMAIL
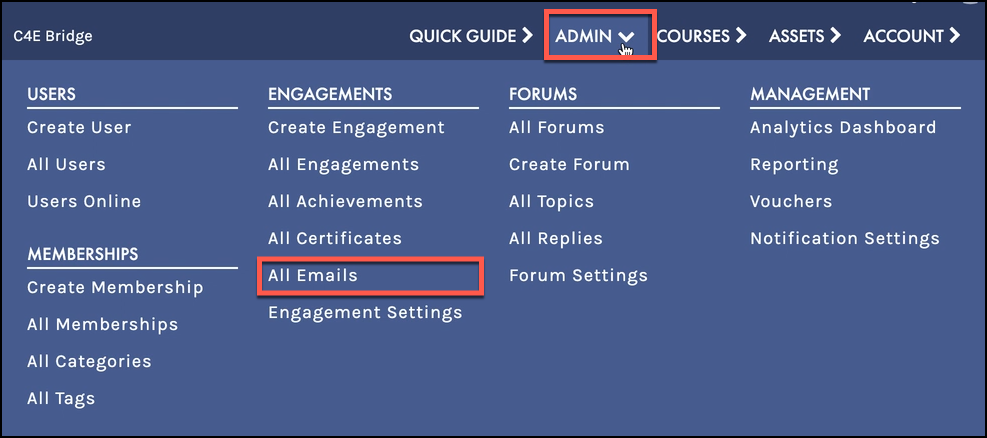
This article will explain how to create an email and attach it to an engagement and send it when the triggering event has been achieved by the learner.In the main navigation go to ADMIN > ENGAGEMENTS > ALL EMAILS:
Select the Create New Email button.
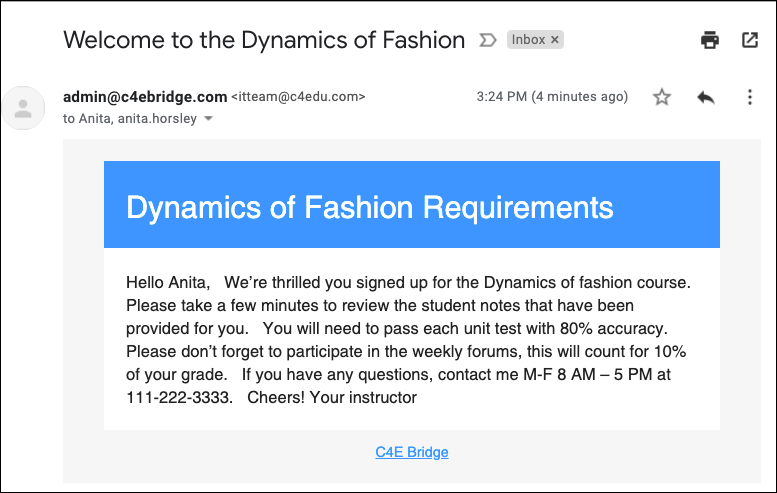
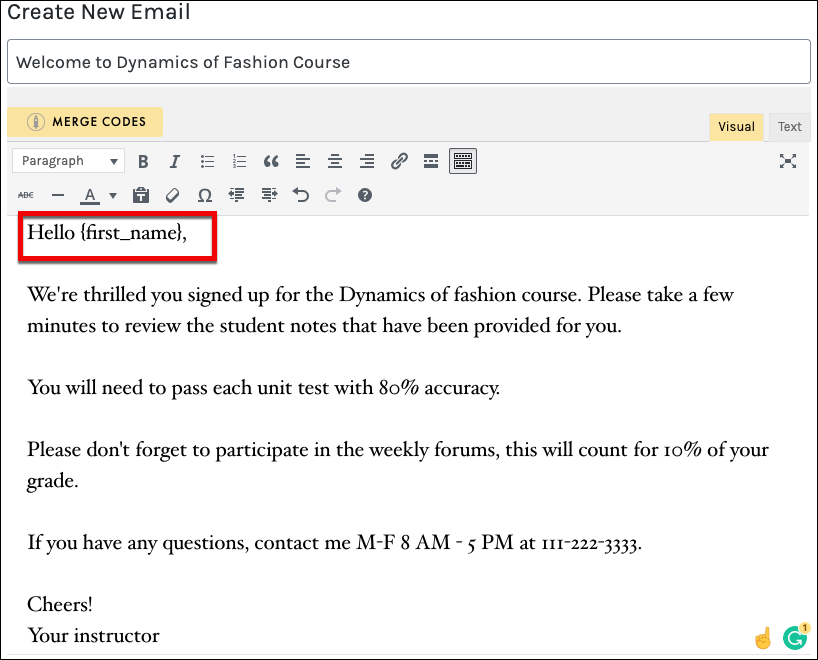
Pick a name for your email (for internal use) and fill in the content of your email in the text editor box:
0
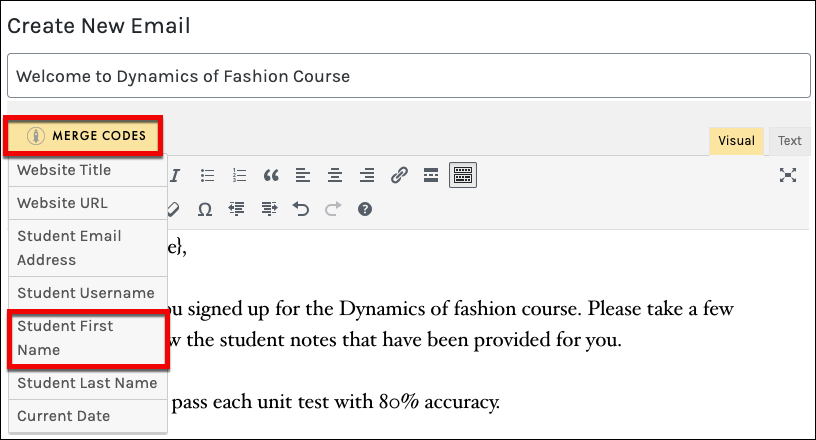
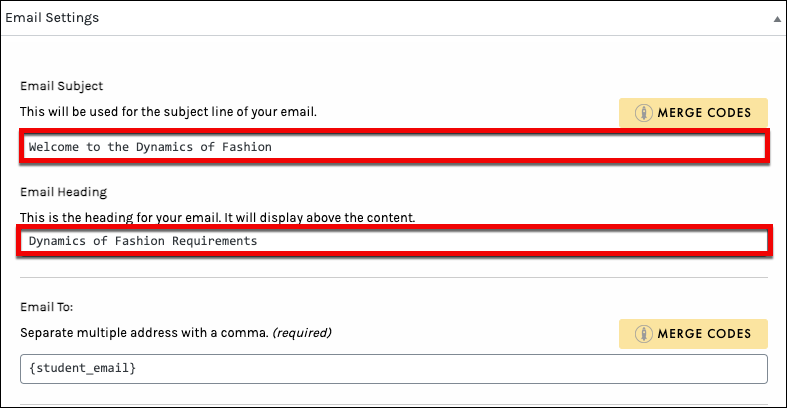
In the EMAIL SETTINGS Settings area, you also have the option of using the Merge Codes or you can type in the field provided:
Email Subject: This will be used for the subject line of your email.
Email Heading: This is the heading for your email. It will display above the content.
Email To: Separate multiple address with a comma.
Email CC: Separate multiple address with a comma.
Email BCC: Separate multiple addresses with a comma.
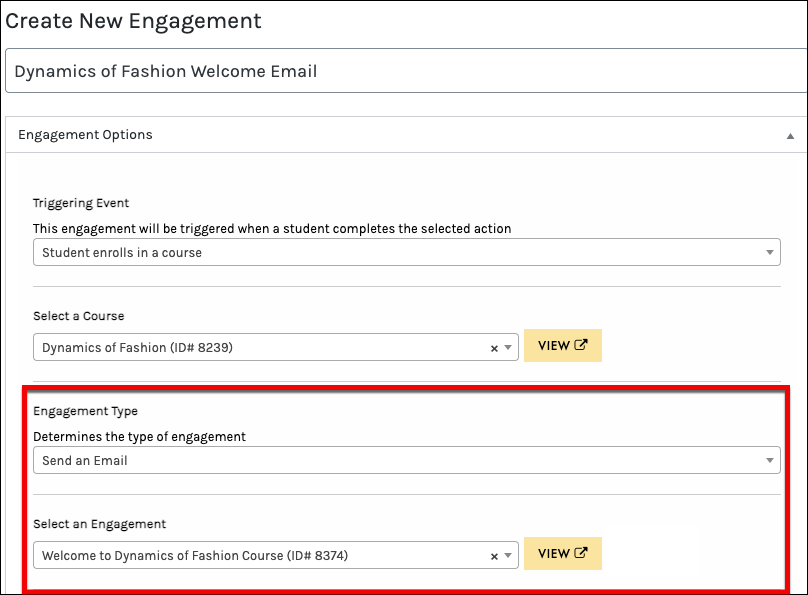
Next, you will need to create an engagement and add the email engagement.
Navigate to ADMIN > ENGAGEMENTS > CREATE ENGAGEMENT
Add the title and fill out the fields.
Email CC: Separate multiple address with a comma.
Make sure to select your Triggering Event (the event that causes the achievement to be issued). Ensure to select ‘Email’ for your Engagement Type.