Tutorials
- USER GUIDES & VIDEO TUTORIALS
- ALL VIDEO TUTORIALS
- OVERVIEW
- ASSETS
- CREATE COURSE
- Getting Started with Creating Courses
- Create Course - Course Settings
- Course Builder (TOC)
- Build Lessons
- Lesson Settings
- Lesson Page Navigation
- Lesson Editor Overview
- Lesson Editor - File Options
- Add Content - Tools: Assets
- Add Content- Tools: Page Elements
- Add Content - Page Templates
- Add Content - Layout Templates
- Save As a Row, Column, Tool As a Template
- Tool Settings
- Row Effects
- MANAGE COURSES
- MANAGE TEMPLATES
- MANAGE XAPI
- ADMIN
- ACCOUNT
Lesson Settings
QUICK START VIDEO TUTORIAL – LESSON SETTINGS
2.27
LESSON SETTINGS
ACCESSING EDIT LESSON SETTINGS
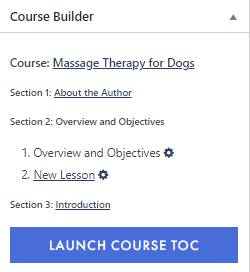
- Within the Course Builder (TOC): From the Course Builder window, hover over any lesson title to access the right-hand tool icons and select OPEN LESSON SETTINGS:
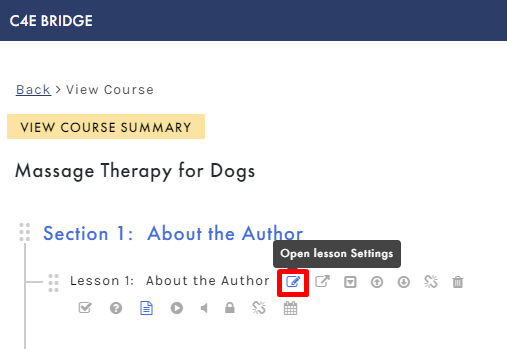
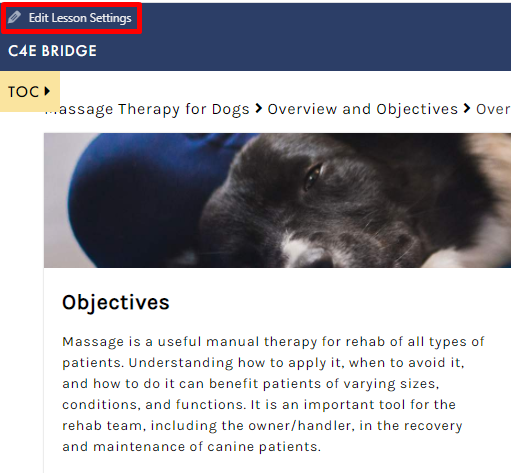
- From the Course Summary page (COURSES > MY COURSES > VIEW COURSE SUMMARY): From the Course Summary page, select the lesson you wish to edit, then click EDIT LESSON SETTINGS (top left corner):
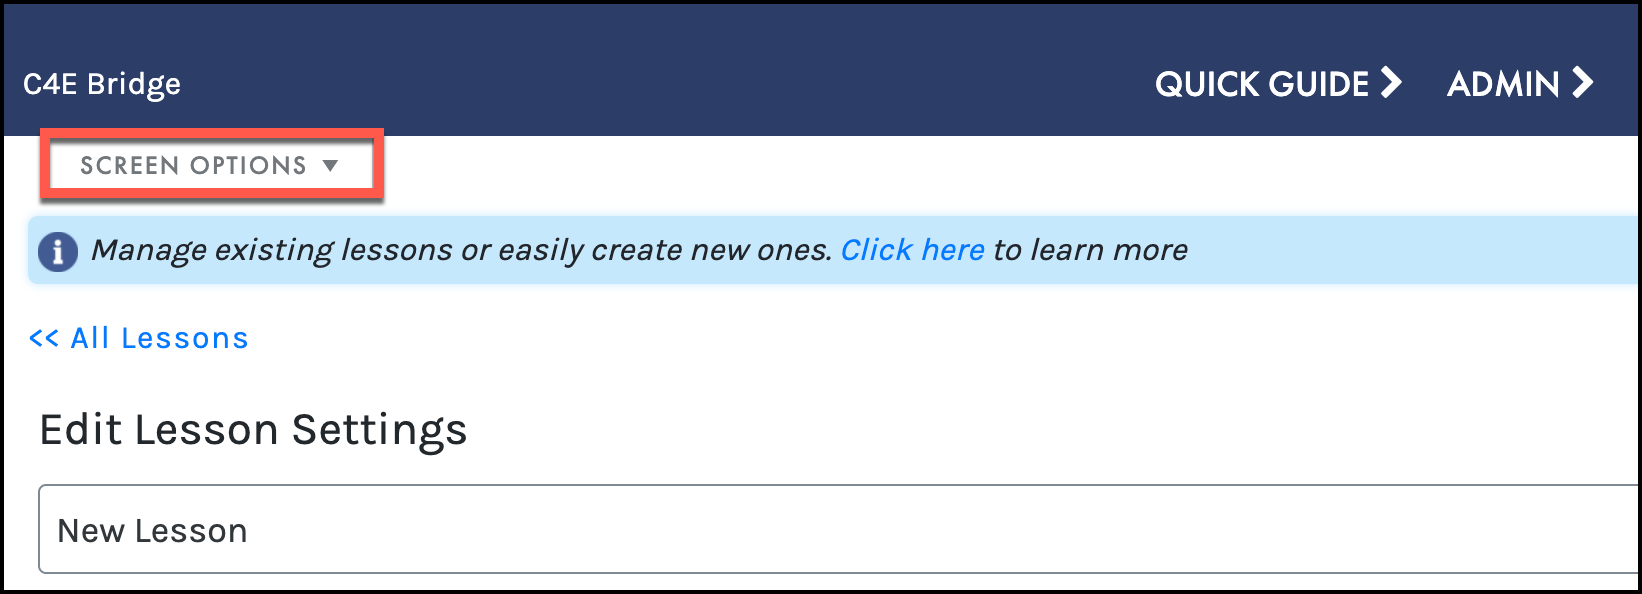
SCREEN OPTIONS
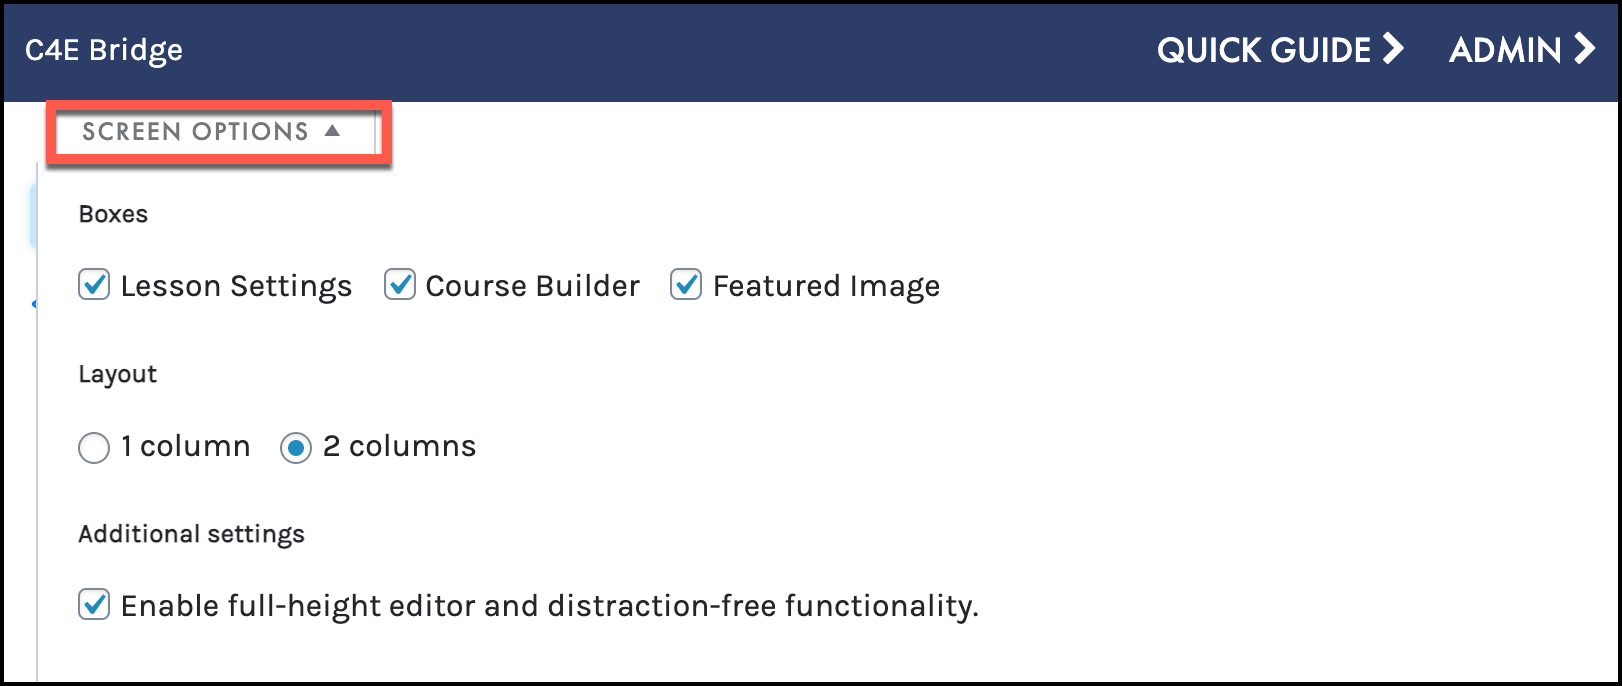
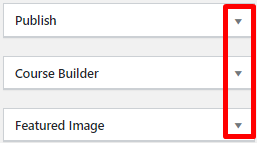
EDIT LESSON SETTINGS – PANELS OVERVIEW
- To collapse an expanded panel, select the upward facing arrow:
- To expand a minimized panel, select the downward facing arrow:
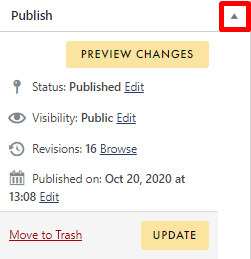
PUBLISH PANEL
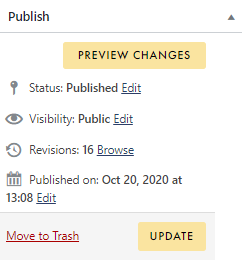
- STATUS: Published is selected by default. You may adjust the status by clicking EDIT and selecting a new status. If your lesson requires additional review before publishing, select PENDING REVIEW from the STATUS dropdown, then click OK (or click CANCEL to close without saving your change):

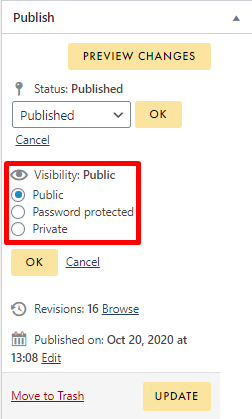
- VISIBILITY: Edit your visibility to PUBLIC, PASSWORD PROTECTED, or PRIVATE by clicking EDIT and selecting a new visibility status. By default, your visibility is set to Public but can be modified to Private or Password protected. To enable a password, select PASSWORD PROTECTED, enter a password, and click OK (or click CANCEL to close without saving your change):
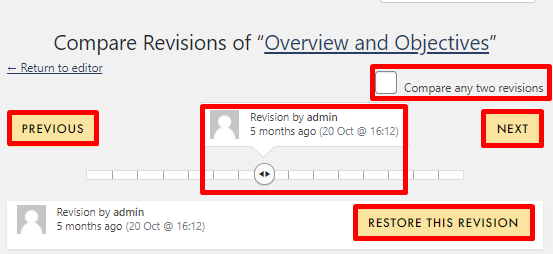
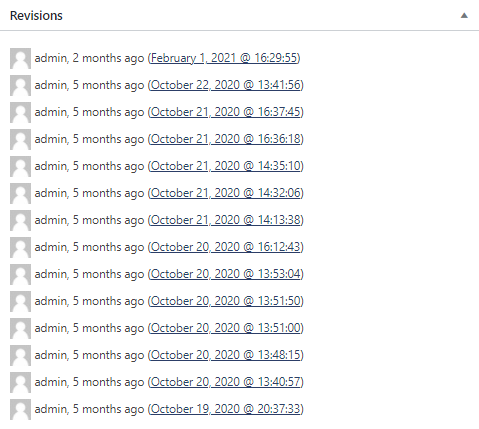
- REVISIONS: Access any previous lesson revisions by clicking BROWSE. You will be redirected to the REVISIONS screen, where you can: access a previous version of your lesson using the slider tool and PREVIOUS and NEXT buttons, compare version details, and restore previous versions:
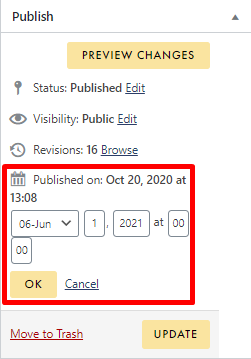
- PUBLISHED ON: To change the date on which this lesson should be published, select EDIT and modify the date/time fields:
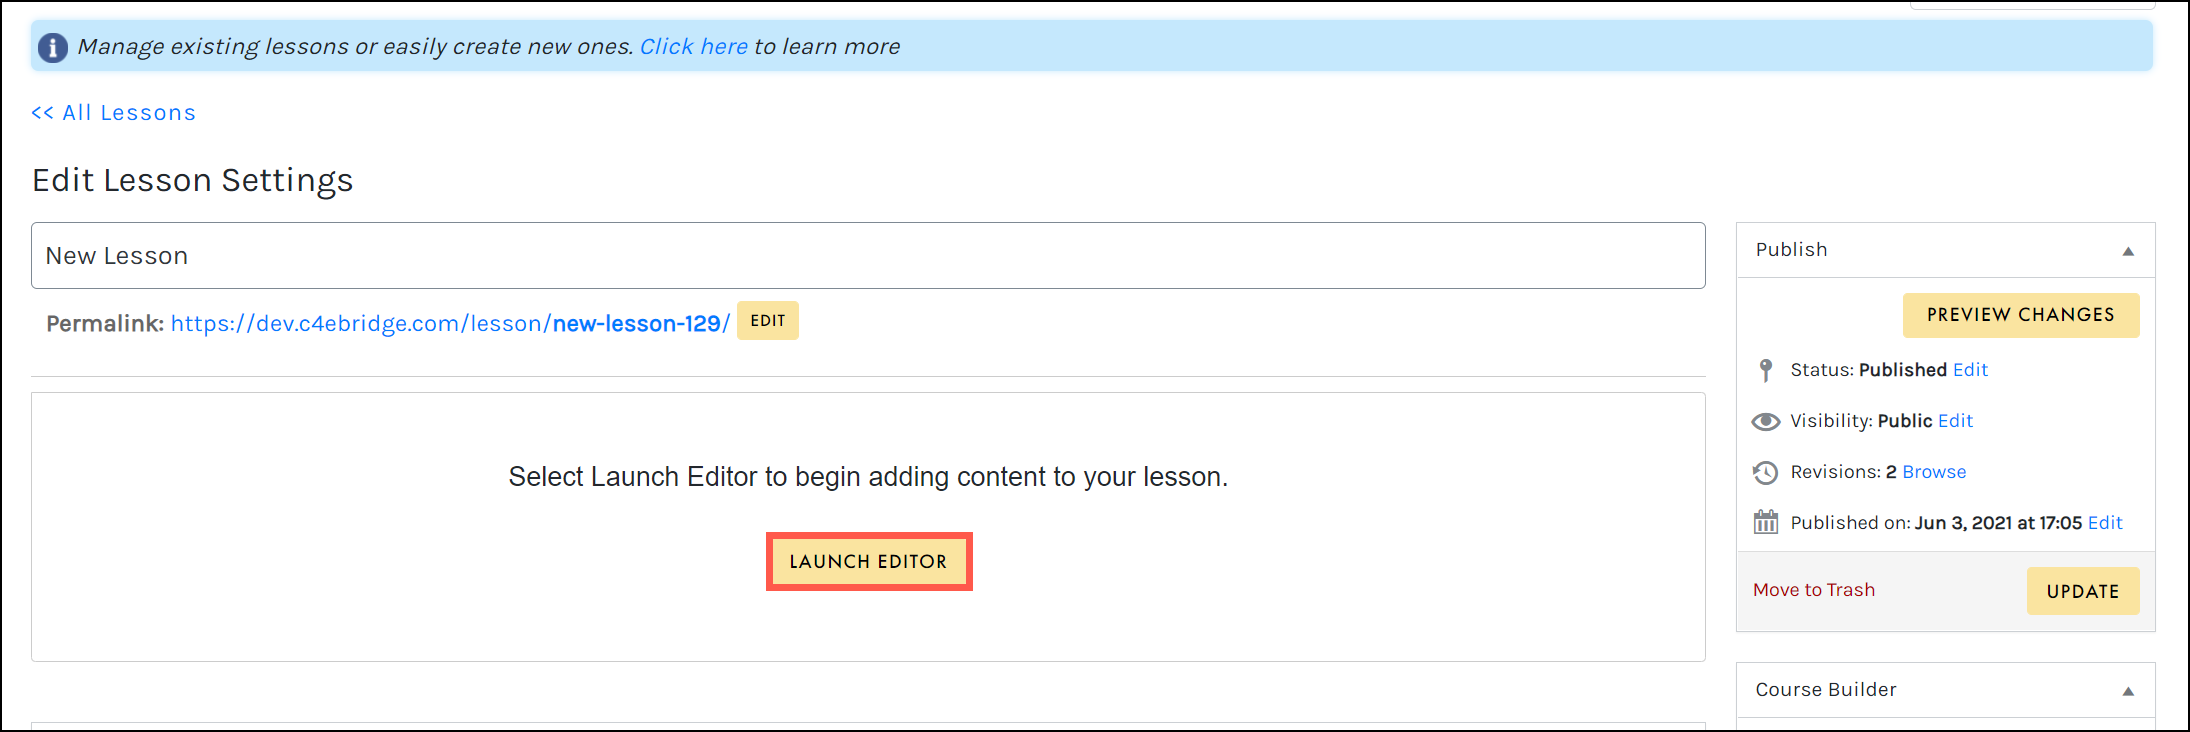
- UPDATE: Once your changes to this lesson are complete, ensure you select the UPDATE button to save:
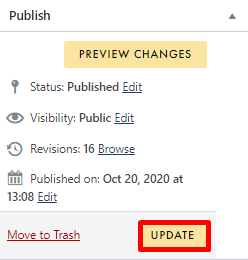
- PREVIEW CHANGES: Use this option to preview the changes you just made.
- MOVE TO TRASH: To discard this lesson and move your course to trash, select MOVE TO TRASH
 Lessons cannot be individually deleted. Moving a lesson to trash will move your entire course to trash. If your course is deleted by accident, you may restore it from the Edit Course Settings page.
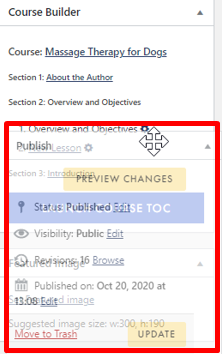
COURSE BUILDER PANEL
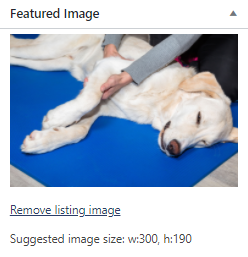
FEATURED IMAGE PANEL
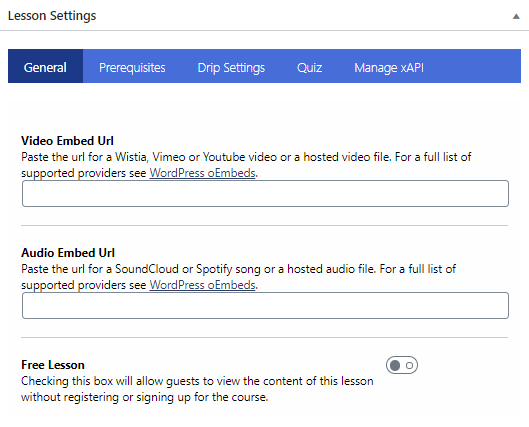
LESSON SETTINGS PANEL
-
- Embed a video file at the top of the lesson page by entering the URL of a Wistia, Vimeo, YouTube, or hosted video file in the VIDEO EMBED URL field.
- Embed an audio file in your lesson page by entering a SoundCloud or Spotify URL in the AUDIO EMBED URL field.
- Make this lesson a free lesson by toggling the FREE LESSON option to allow non-registered visitors to view the lesson without registering for the course.
- Toggle ENABLE PREREQUISITES on, then select the lesson you’d like to have learners complete prior to accessing your current lesson.
- You can use the dropdown menu to browse through all available lessons, or type in the search field to search for a specific lesson.
- To set a course as a perquisite for this lesson, you can select the last lesson of the desired course as the prerequisite.
- Using this tab, you can make this lesson available after a set amount of time has passed after enrollment (AFTER COURSE ENROLLMENT option) or on a specific date/time (ON A SPECIFIC DATE option).
- By default, drip is set to none. To enable, simply select the Drip Settings tab, select your preferred drip method (AFTER COURSE ENROLLMENT or ON A SPECIFIC DATE), and then set your preferred date/time frame.
QUIZ TAB: The Quiz tab allows you to require a passing grade for the quiz in this lesson, requiring students to receive a passing score on the quiz before they can complete the lesson. (The passing percentage for this quiz can be defined in the Quiz Editor.)
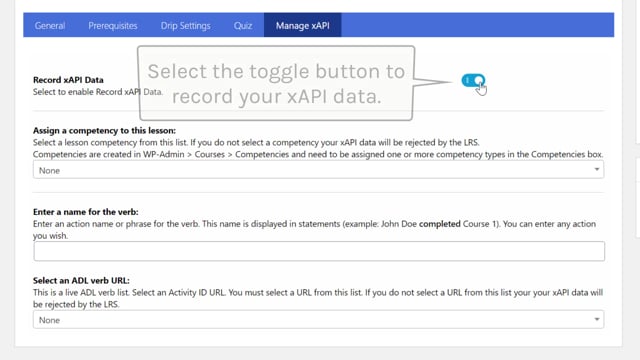
MANAGE xAPI TAB: If this lesson contains an xAPI package, this tab allows you to record xAPI data (to record such user data as course completion, quiz results, and more), assign a competency to the lesson, and enter a name for the verb or select an ADL verb URL to track specific words or phrases.
As you make changes to your lesson, be sure to periodically save your progress by clicking UPDATE on the Publish panel in the Edit Lesson Settings window.
 To learn more about xAPI packages, visit the XAPI section. To learn more about adding and managing competencies, visit the Competency section.
REVISIONS PANEL
UPDATE LESSON SETTINGS

To learn more about EDIT MODE in the Lesson Editor, visit the Lesson Editor section.
To learn more about the LESSON EDITOR visit the Lesson Editor section.