QUICK START VIDEO TUTORIAL – TEMPLATES
Watch this short video, and start mastering Templates:
PAGE AND TOPIC TEMPLATES
OVERVIEW
Templates are prebuilt content pages and layouts that can be applied to your lessons with a single click! These templates can contain any combination of rows, columns, tools, and elements, and can append or replace existing layouts. C4EBridge offers a number of built-in layout templates, helping to jumpstart the lesson design process. You can easily find a template similar to the design you want, make any tweaks to customize the layout, and add your own content, giving you a visually appealing lesson in no time. You can also experiment with the various available layout templates for inspiration or to learn how the layout was constructed. Once a template is added to a lesson, any aspect of its layout, design, or content can be modified.
ADD TEMPLATES TO YOUR LESSON
Templates can be added from the
Templates tab of the
Add Content menu on the
Lesson Editor window (with editing on):
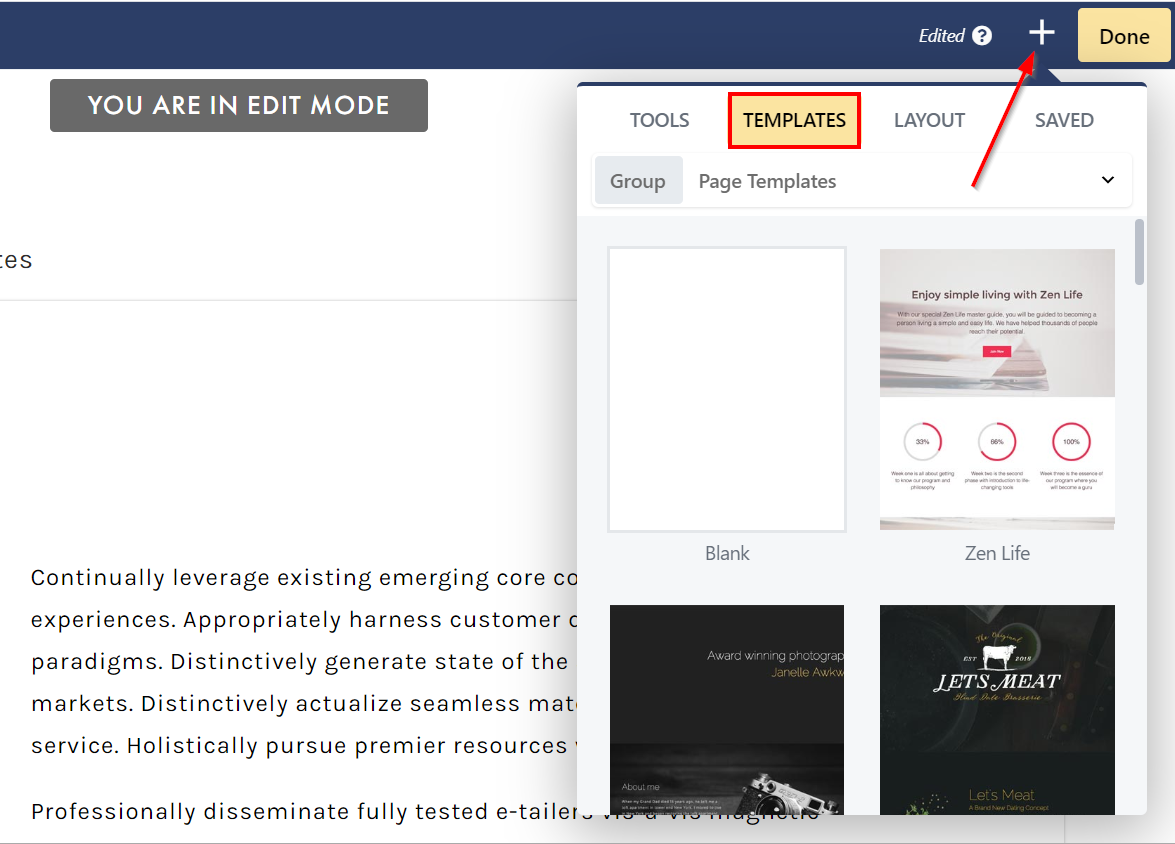
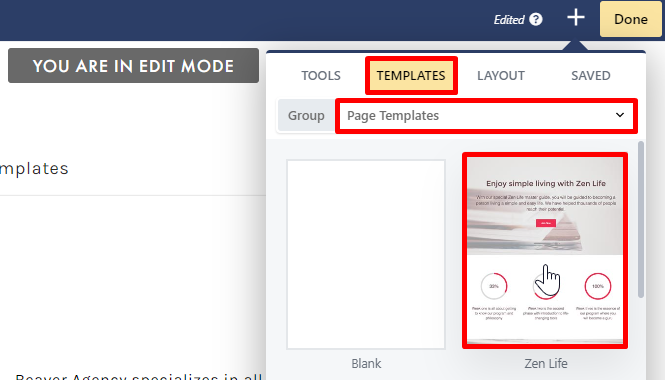
From the
Templates tab, you can click
PAGE TEMPLATES to toggle to a different template group:
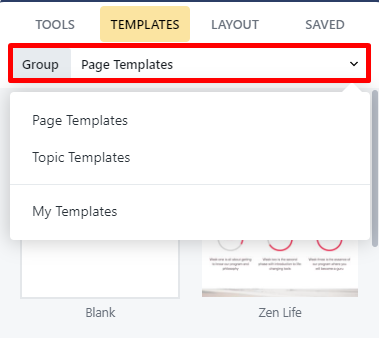
The following template groups are available in the drop down:
- Page Templates
- Topic Templates
- My Templates
PAGE TEMPLATES
Page templates are templates that span your lesson page, featuring thoughtful groupings of columns and rows that allow you to create a cohesive lesson page. Page templates are also ideal for title and introduction pages for your lessons, as in the following examples:
- Royal Academy page template:

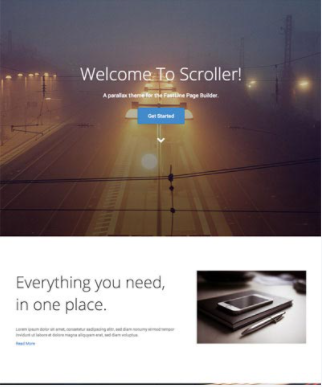
- Scroller page template:
When you are ready to add a new page template from the
Templates tab on the
Add Content menu, click to select your template:
 Simply click the template you wish to add, page templates are NOT draggable.
After selecting your template, you must confirm whether you’d like to
REPLACE EXISTING LAYOUT or
APPEND NEW LAYOUT:
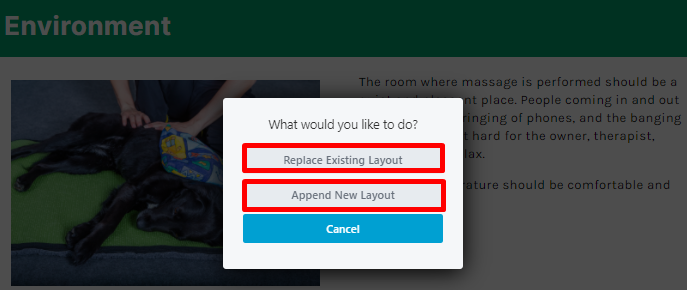
When
APPEND NEW LAYOUT is selected, the template will be placed below the current lesson content, allowing you to customize the added template and add on to your lesson. Conversely, when
REPLACE EXISTING LAYOUT is selected, the template will completely overwrite the existing content (which may be ideal if you’d like to start from scratch with your new template).
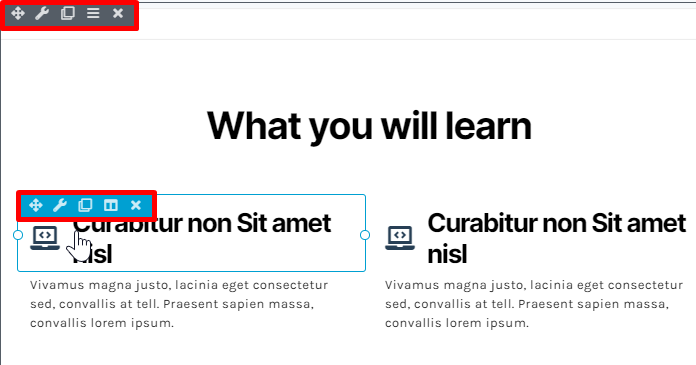
Once a page template has been applied, you can mouse over rows, columns, or tools to quickly edit/add your own content, text, and images:
Once your changes are complete, click
DONE and select
PUBLISH to save your progress:

 See the Lesson Editor section to learn more about editing rows, columns, and tools.
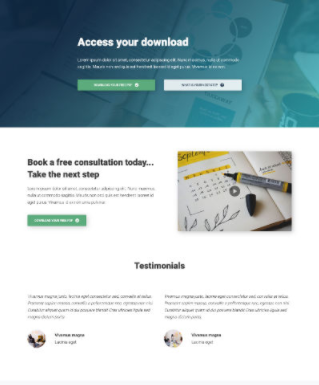
TOPIC TEMPLATES
Topic templates are dedicated to specific page topics, such as
About, Case Study, Event, or
Download, as in the following examples:
- About topic template:

- Case Study topic template:
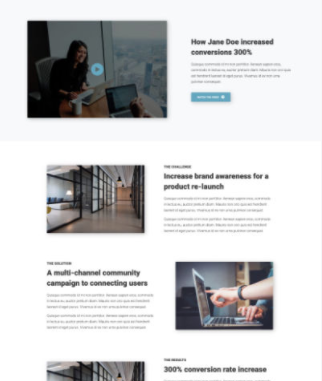
- Event topic template:

- Download topic template:
When you are ready to add a new topic template from the
Templates tab on the
Add Content menu, click to select your template:
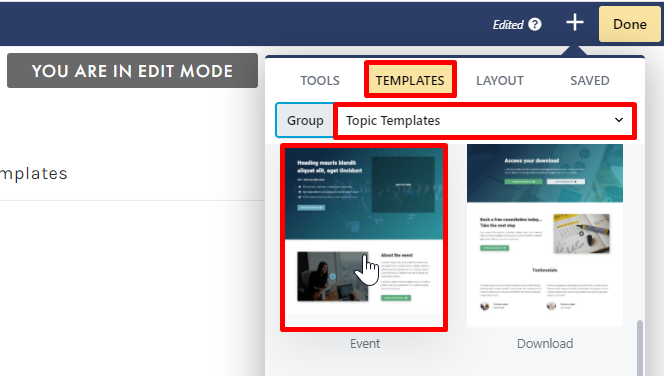
Simply click the template you wish to add, topic templates are NOT draggable.
After selecting your template, you must confirm whether you’d like to
REPLACE EXISTING LAYOUT or
APPEND NEW LAYOUT:
When
APPEND NEW LAYOUT is selected, the template will be placed below the current lesson content, allowing you to customize the added template and add on to your lesson. Conversely, when
REPLACE EXISTING LAYOUT is selected, the template will completely overwrite the existing content (which may be ideal if you’d like to start from scratch with your new template).
Once a topic template has been applied, you can mouse over rows, columns or tools to quickly edit/add your own content, text, and images:
Once your changes are complete, click
DONE and select
PUBLISH to save your progress:
See the Lesson Editor section to learn more about editing rows, columns, and tools.
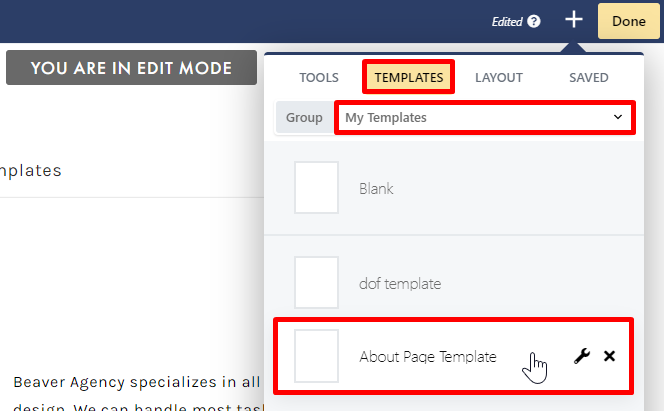
MY TEMPLATES
The
My Templates option on the
Templates tab allows you to access any of your saved templates:
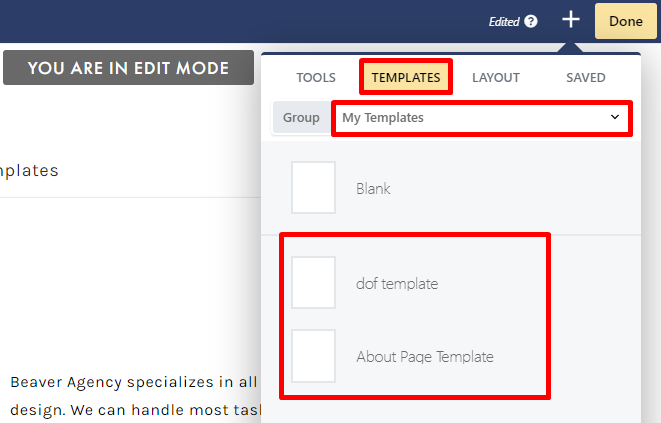
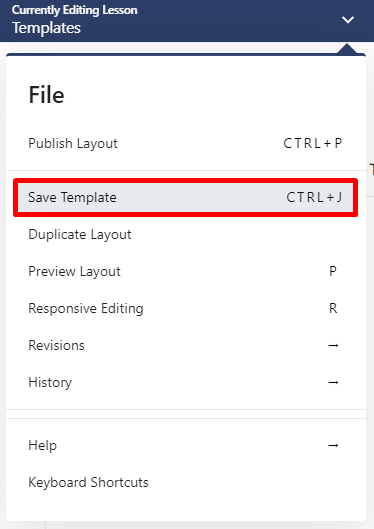
You can save the layout of any page as a template. Whether you modify an existing page or topic template, or build one from scratch, you can save it by selecting
SAVE TEMPLATE from the
File menu (top left) on the
Lesson Editor window:
This is useful when:
- You want your site to conform to a layout across more than one page.
- You want to use the same layout or content on another site.
- You want to share your layout with another person, or they want to share with you. Exported layouts can be used by anyone else with a premium version of C4EBridge.
Saved page or topic templates are NOT global. When editing a saved page or topic template, your changes will not be applied to any other pages using this template.
When you are ready to add a saved template from
My Templates on the
Templates tab, simply click to select your template:
After selecting your template, you must confirm whether you’d like to
REPLACE EXISTING LAYOUT or
APPEND NEW LAYOUT:
When
APPEND NEW LAYOUT is selected, the template will be placed below the current lesson content, allowing you to customize the added template and add on to your lesson. Conversely, when
REPLACE EXISTING LAYOUT is selected, the template will completely overwrite the existing content (which may be ideal if you’d like to start from scratch with your new template).
Once a saved template has been applied, you can mouse over rows, columns, or tools to quickly edit/add your own content, text, and images:
Once your changes are complete, click
DONE and select
PUBLISH to save your progress:
See the Lesson Editor section to learn more about editing rows, columns, and tools.
LAYOUT TEMPLATES
The
Layout tab on the
Add Content menu offers quick row and column layouts that can be added to your lesson page and easily customized:
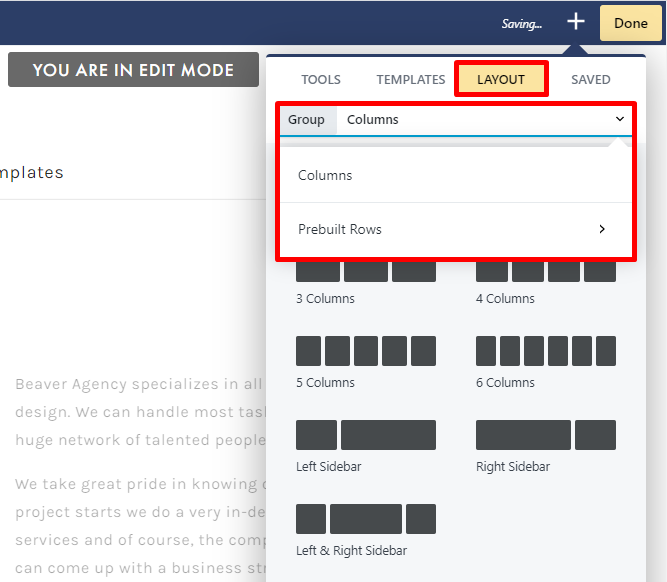
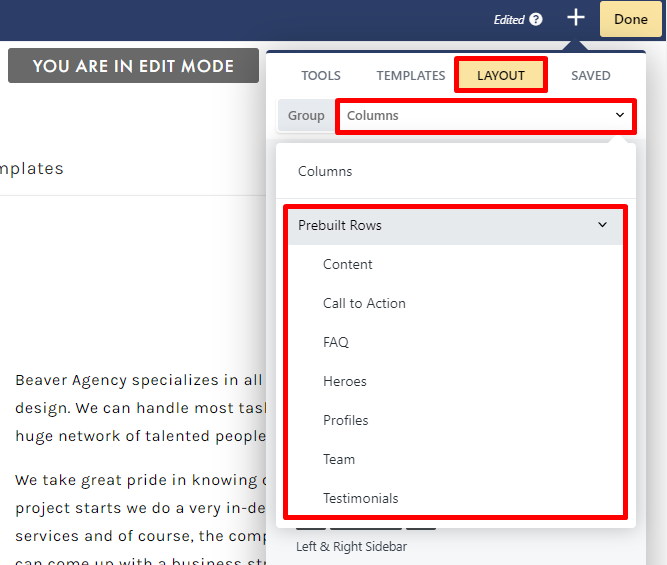
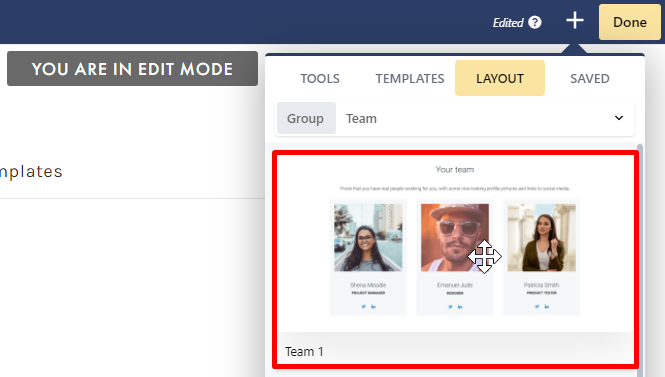
While columns are basic building blocks of your lesson page, prebuilt rows are helpful templates that feature an arrangement of columns, organized by type (i.e.,
Content, Call to Action, Team). These are smaller than the page and topic templates found on the
Templates tab of the
Add Content menu, making them useful for when wanting to build up specific areas of your pages without using full-page templates. You can choose from any number of prebuilt rows to add to your layout and modify as you like.
When you are ready to add a prebuilt row from the
Layout tab on the
Add Content menu, click
COLUMNS and toggle to
PREBUILT ROWS to select your row type:
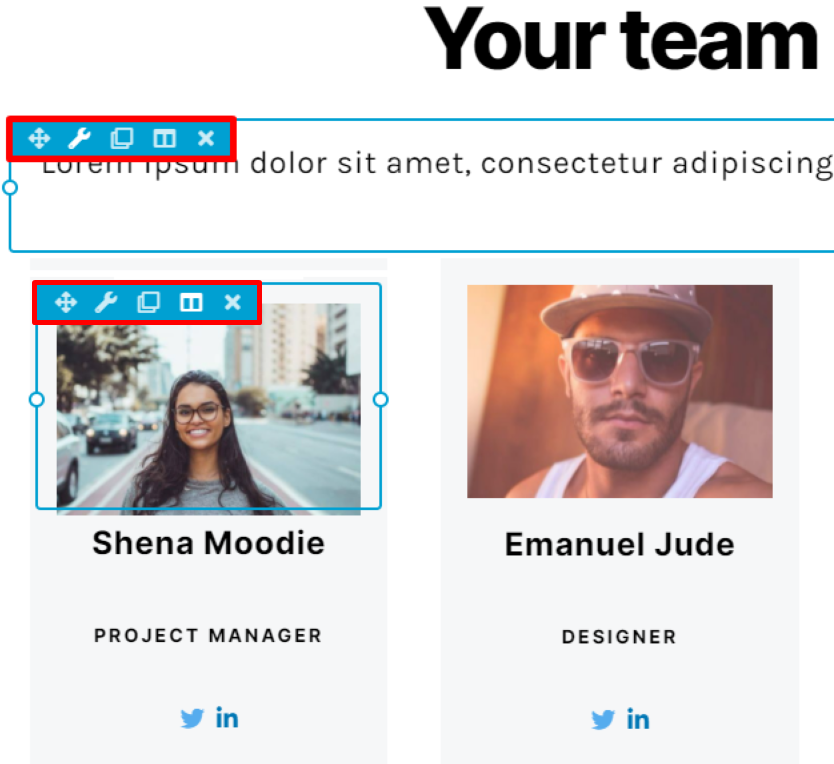
You may drag the prebuilt row you wish to add and drop it to the desired location on your lesson page:
As you drag, a blue guide will appear, marking spots where you can drop this prebuilt row:

Unlike page and topic templates, prebuilt rows or columns from the Layout tab are draggable.
 While you cannot drop a row within another row, you can instead drag and drop it above or below other rows.
Once your prebuilt row has been added, you can mouse over the columns or tools to quickly edit/add your own content, text, and images:
Prebuilt rows may come with images and text. Any images that appear with your prebuilt row are not stored in your media library, so you’ll need to replace these with your own images. Prebuilt row text uses default site settings, but can be customized from the Typography section of the Style tab.
Once your changes are complete, click
DONE and select
PUBLISH to save your progress:
To save any personalized prebuilt row as a template for reuse, see the Save As a Row, Column, or Tool for Reuse section
ALTERNATIVES TO LAYOUT TEMPLATES
In addition to templates, there are a few other options available for reusing layouts:
- Duplicate a layout to a new page. You can duplicate a C4EBridge layout to a new page on your site without first saving it as a layout template. Simply use the steps below.
The original layout must be published or saved before you can duplicate it. If you make any changes to the layout after opening the page, then duplicate it BEFORE saving the page, the duplicated page will not show the changes, and the changes may be lost on the source page as well.
- Open the lesson page you wish to duplicate.
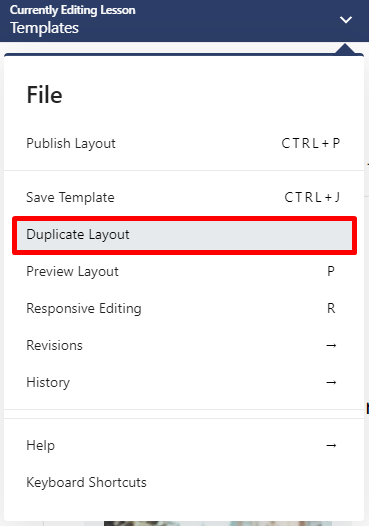
- From the File menu (top left) on the Lesson Editor, select DUPLICATE LAYOUT:
- The Edit Lesson Settings window for the new duplicated page will open, allowing you to rename the page title and permalink and make any other necessary changes:
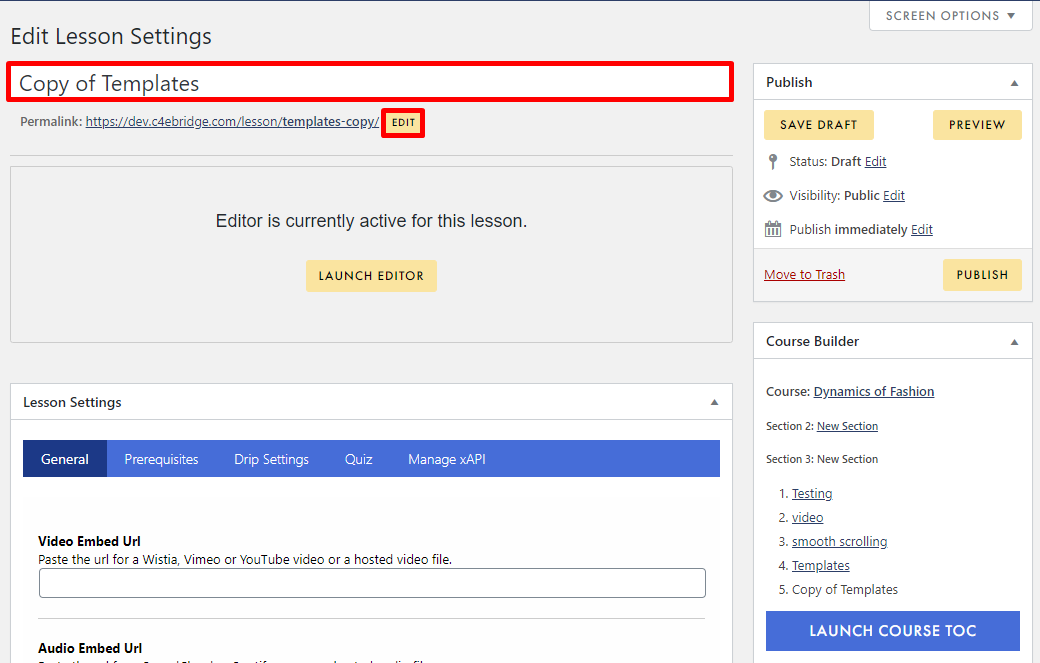
- Once your changes are complete, click PUBLISH in the Publish panel:
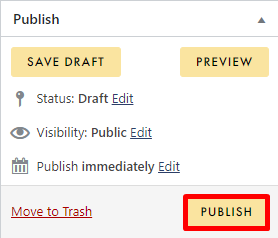
If you’d prefer, you can instead click SAVE DRAFT to save your changes but not publish.
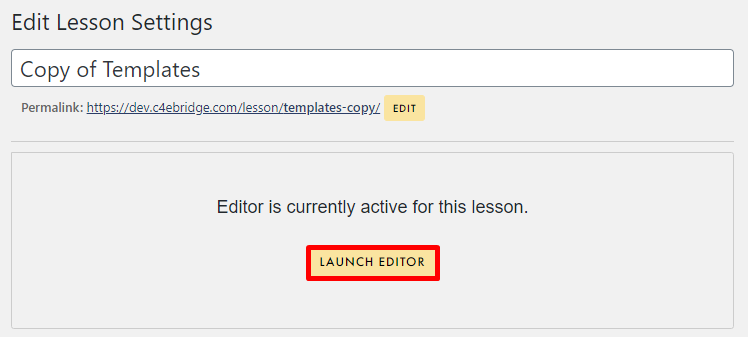
- You will then need to click LAUNCH EDITOR to access the Lesson Editor and begin editing your new template.:
-
- Save individual rows, columns, and tools. You can save and export individual rows, columns, or tools to use as templates, in lieu of using page or topic templates. This is helpful when wanting to reuse specific components of your layouts across multiple lessons/pages. If you save these items as global objects, you can make changes in one place, which will be applied everywhere else this item is used in C4EBridge.
To learn more about saving and reusing rows, columns, and tools visit the article here
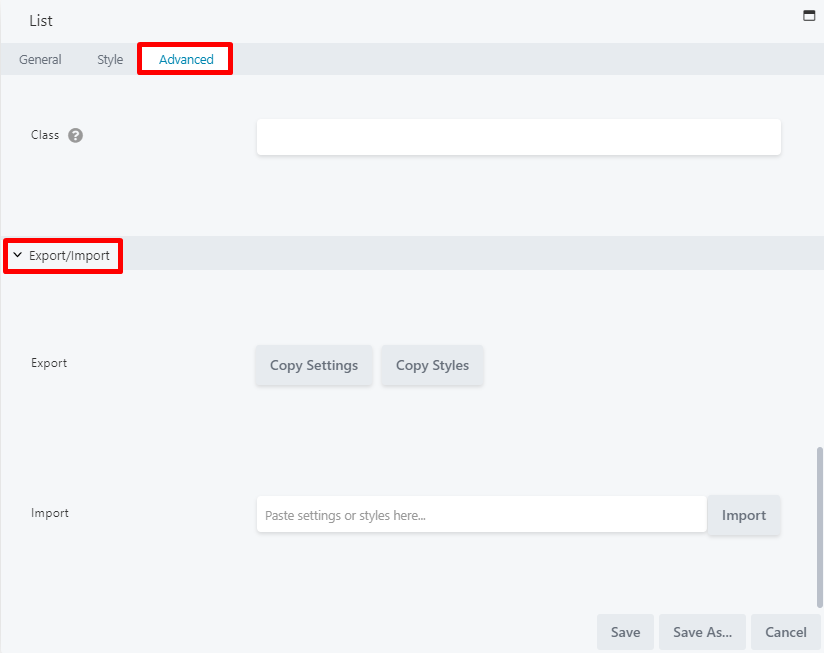
- Copy and paste tools. Copying and pasting individual tools lets you easily reuse these items across multiple pages and layouts. You can copy and paste individual tools and tool styles using the Export/Import option on the Advanced tab of a tools settings panel: