Tutorials
- USER GUIDES & VIDEO TUTORIALS
- ALL VIDEO TUTORIALS
- OVERVIEW
- ASSETS
- Getting Started with Assets
- Creating Collections
- Uploading Image Assets
- Upload Audio Assets
- Uploading Document Assets
- Uploading Video Assets
- Bulk Uploading Assets
- Asset Details
- Categories And Tags
- CREATE COURSE
- MANAGE COURSES
- MANAGE TEMPLATES
- MANAGE XAPI
- ADMIN
- ACCOUNT
Upload Audio Assets
Table of Contents
UPLOADING AUDIO ASSETS
QUICK START VIDEO TUTORIAL
Watch this short video, and start Uploading Audio: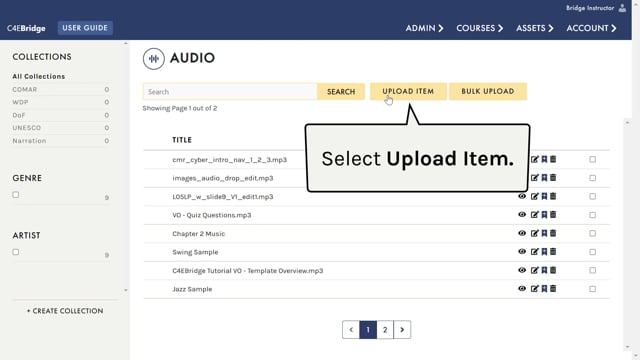
Uploading Audio
2.27
Uploading audio assets to your library is done in much the same way as adding images, by using the UPLOAD ITEM button to add individual audio files or using the BULK UPLOAD option to upload multiple files at once.
 With the Basic Subscription, the supported audio are .mp3 files. If you want to upload .wav audio files, use Media Encoder or another converter tool.
UPLOADING INDIVIDUAL AUDIO FILES
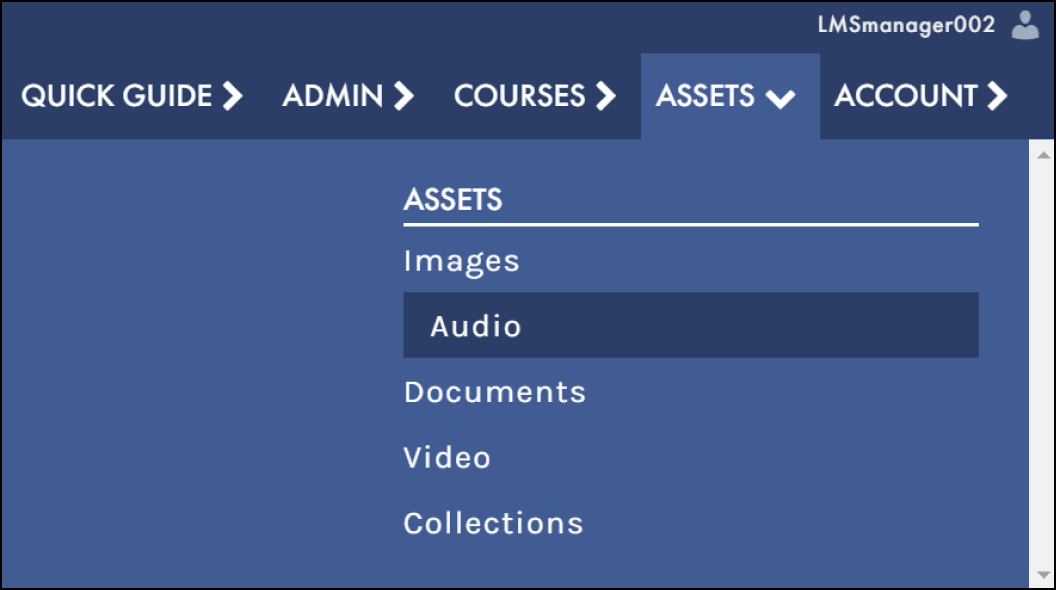
- From the top navigation, select ASSETS > AUDIO:
- Select the UPLOAD ITEM button:

- From the SOURCE dropdown, choose FILE or URL:
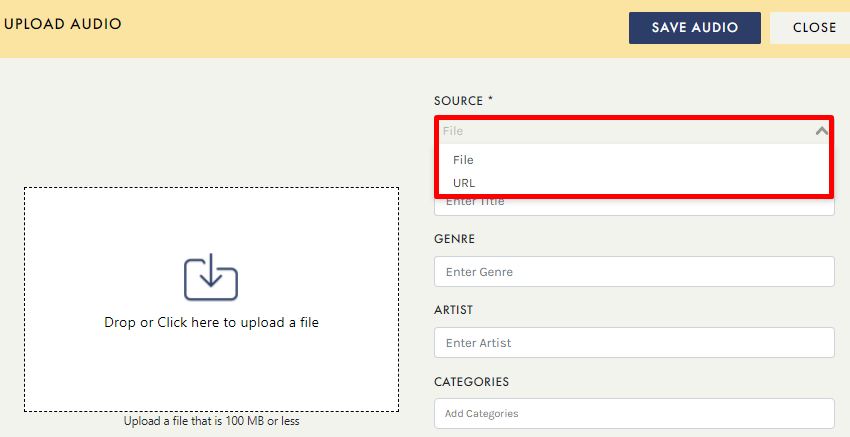
- FILE : To upload an audio file from your computer, select FILE and simply drag and drop your locally saved file, or select the CLICK HERE option in the DROP OR CLICK HERE TO UPLOAD A FILE field to locate and select your desired audio file. Once your audio file has uploaded, add any additional details (including the Title and Usage Rights), and select the SAVE AUDIO button to save your file to your library.
- URL : To quickly save an audio file from a web source (i.e., YouTube), select URL from the SOURCE dropdown. A new field will display beneath SOURCE, allowing you to add your desired URL. Add any additional details (including the Title and Usage Rights), and select the SAVE AUDIO button to save the URL to your library.