Tutorials
- USER GUIDES & VIDEO TUTORIALS
- ALL VIDEO TUTORIALS
- OVERVIEW
- ASSETS
- CREATE COURSE
- Getting Started with Creating Courses
- Create Course - Course Settings
- Edit Course Settings Overview
- Edit Course Settings Panels 1
- Edit Course Settings Panels 2
- Course Information Page
- Student Enrollment
- Course Builder (TOC)
- Build Lessons
- Tool Settings
- Row Effects
- MANAGE COURSES
- MANAGE TEMPLATES
- MANAGE XAPI
- ADMIN
- ACCOUNT
Edit Course Settings Panels 1
Table of Contents
EDIT COURSE SETTINGS QUICK START VIDEO PANELS 1
Watch this short video, and start mastering Editing Course Settings Panels 1
Edit Course Settings 1
2.27
EDIT COURSE SETTINGS PANEL
OVERVIEW
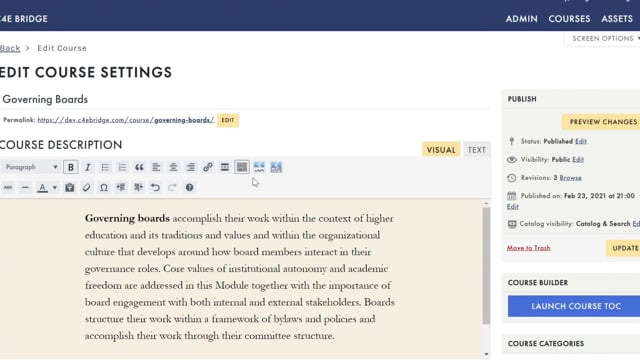
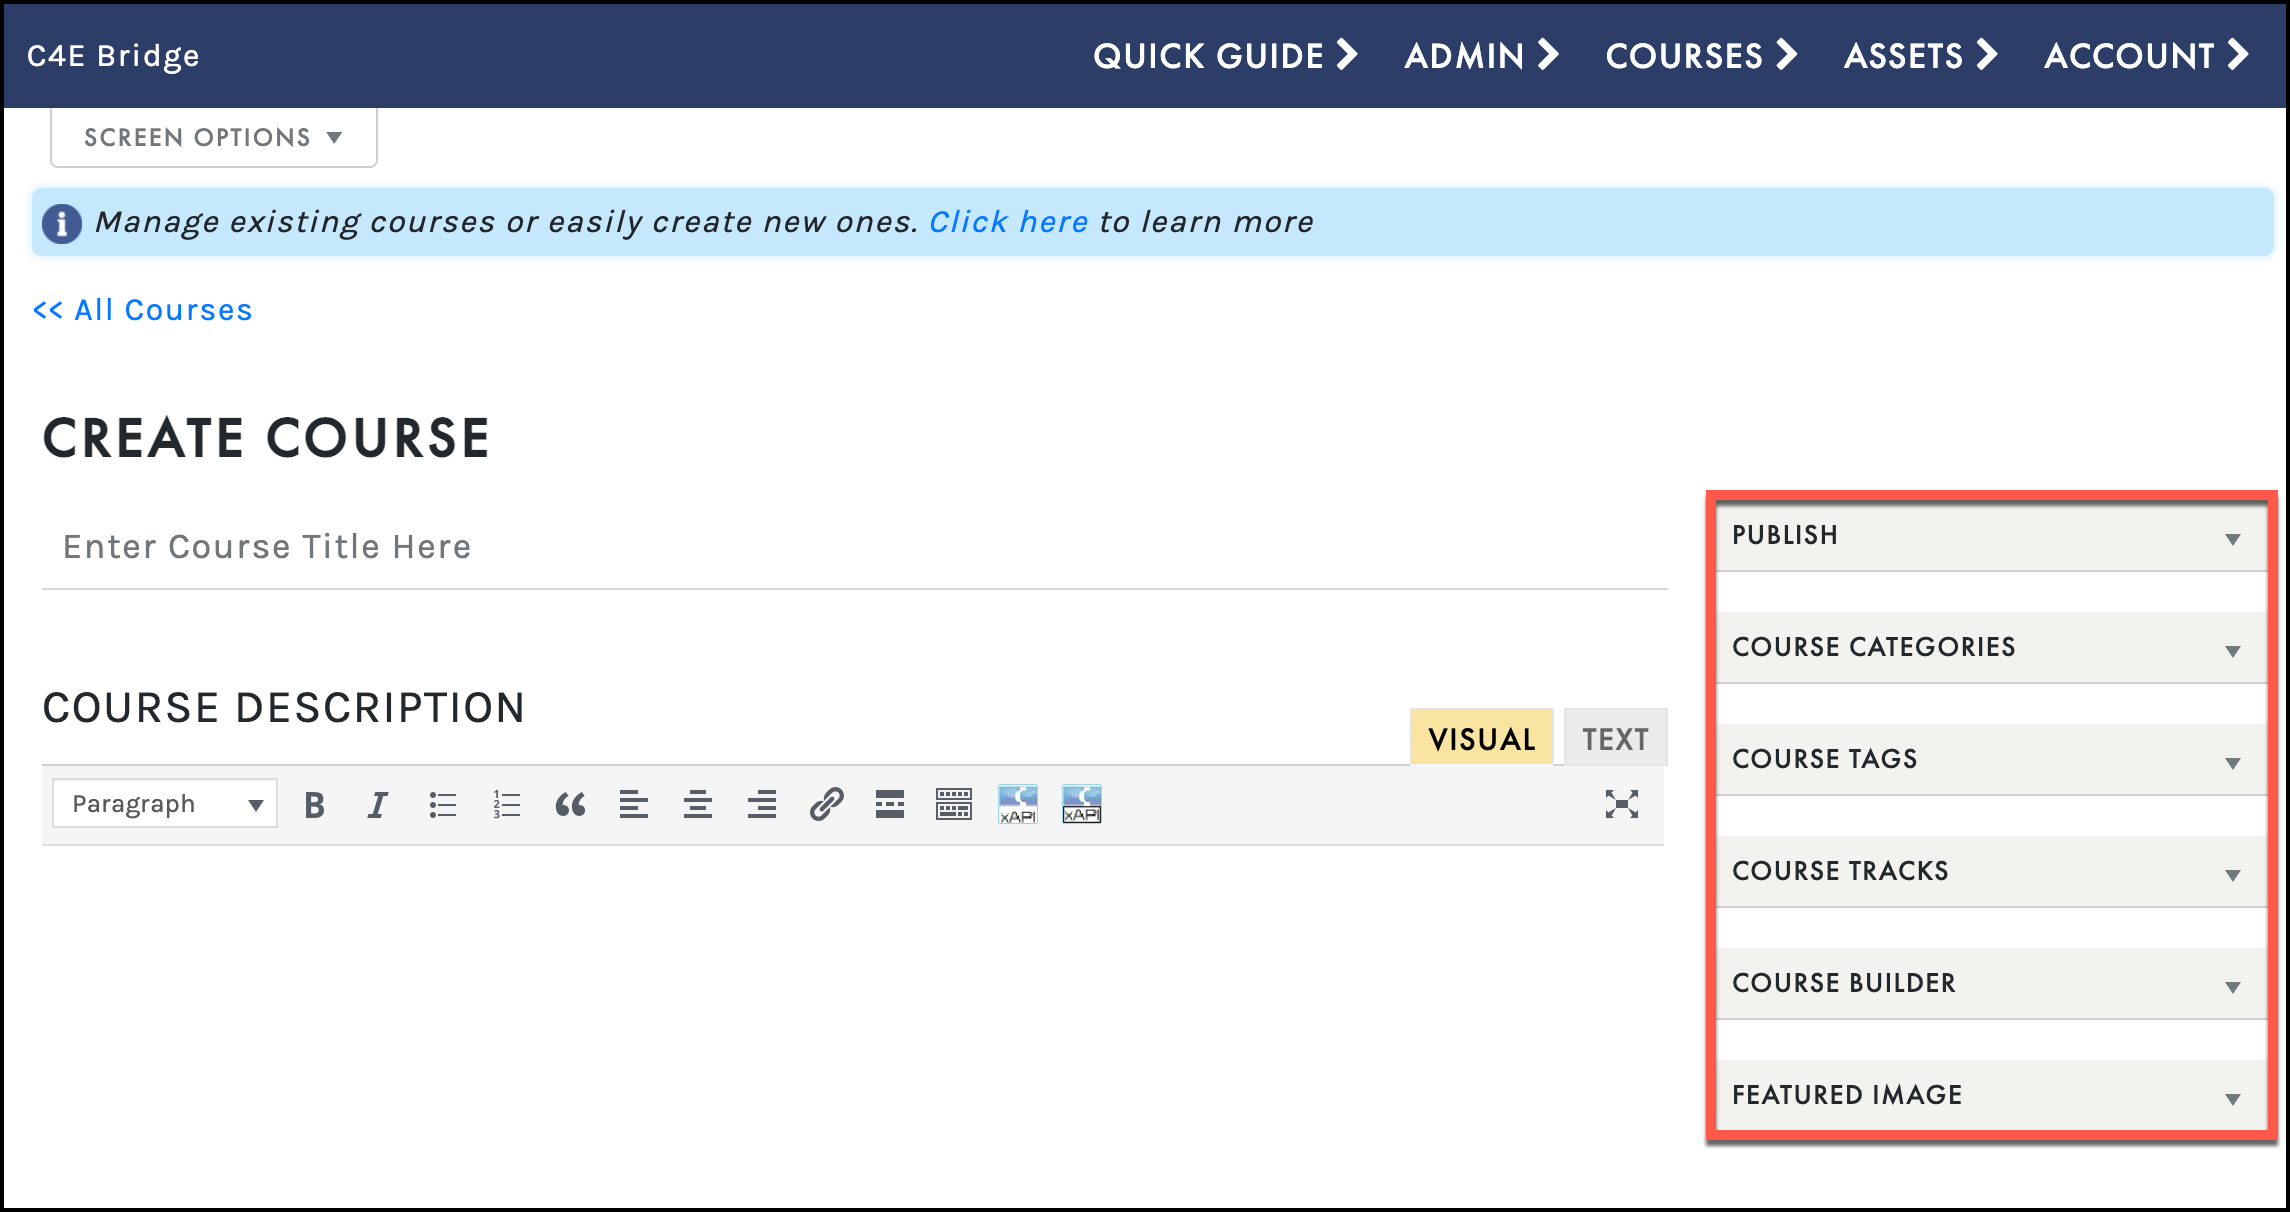
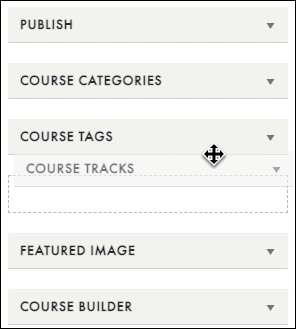
By default, the EDIT COURSE SETTINGS screen features the following panels: Publish, Course Builder, Course Categories, Course Tags, Course Tracks, and Featured Image.
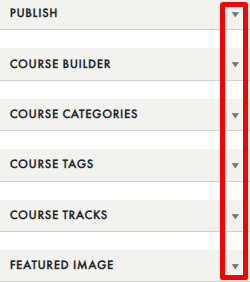
- To collapse an expanded panel, select the upward facing arrow:
- To expand a minimized panel, select the downward facing arrow:
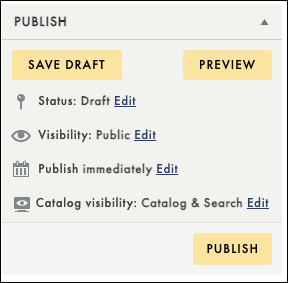
PUBLISH PANEL
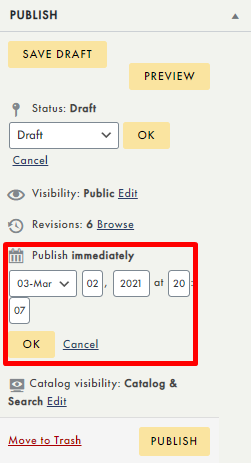
From the Publish panel, you can quickly Save Draft, Preview or Publish your course. The Publish panel also offers the following options:
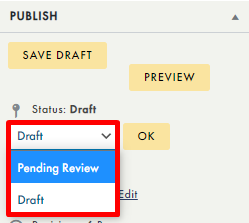
- Status : Adjust the Status of your course by clicking EDIT and selecting a new status. By default, your course is set to Draft status but can be modified at any time. If your course requires additional review before publishing, select PENDING REVIEW from the STATUS dropdown, and click OK (or click CANCEL to close without saving your change):
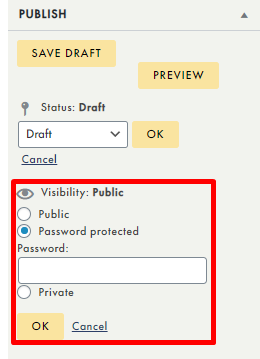
- Visibility : Edit your course visibility to Public, Password protected, or Private by clicking EDIT and selecting a new visibility status. By default, your course visibility is set to Public but can be modified to Private or Password protected. To enable a password, select PASSWORD PROTECTED, enter a password, and click OK (or click CANCEL to close without saving your change):
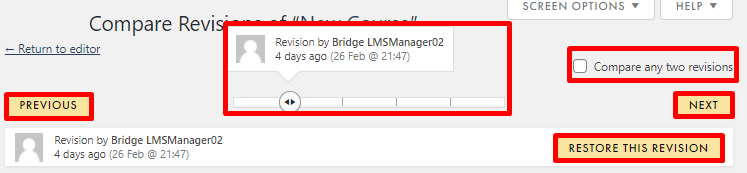
- Revisions : Access any previous revisions by clicking BROWSE. You will be redirected to the REVISIONS, screen, where you can: access a previous version of your course using the slider tool and PREVIOUS and NEXT buttons, compare version details, and restore previous versions:
- Publish immediately : Set by default, this will ensure your course will be published immediately once you have selected the PUBLISH button. To delay publishing your course immediately, you may click EDIT, choose a new date/time, and click OK (or CLICK Cancel to close without saving your change):
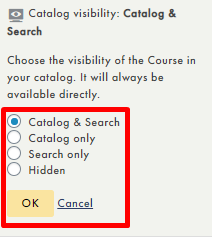
- Catalog visibility : Allows you to adjust the visibility of your course in your catalog. By default, CATALOG & SEARCH is selected. To adjust, click EDIT, select your desired option, and click OK (or CANCEL to close without saving your change):
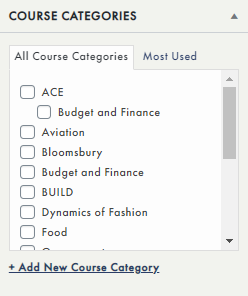
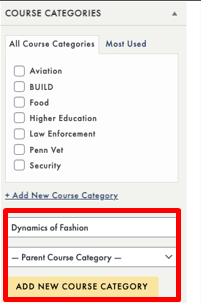
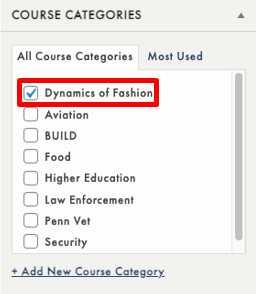
COURSE CATEGORIES PANEL
Course categories are helpful for organizing courses by specific variables they have in common. This is especially helpful for organizations that have large and diverse catalogs of courses, like Universities.
 The option to add and manage course categories is only an LMS Manager role (PREMIER account holder), which has more permissions than the PRO account holder, therefore, PRO account holders will not add or manage categories. If you have a PRO account and want a different category added, please contact C4EBridge support to get approval.
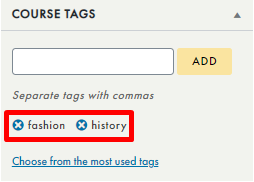
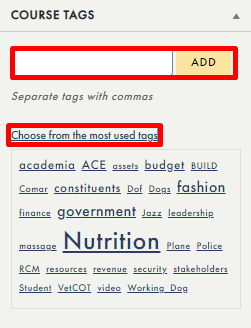
COURSE TAGS PANEL
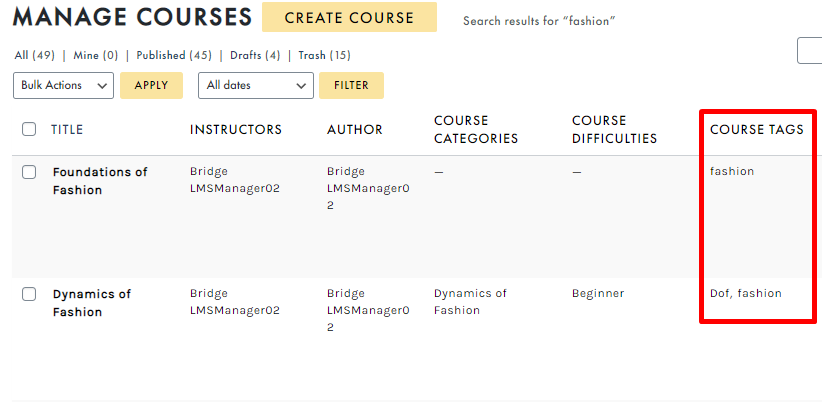
Course tags provides the ability to sort by courses that share the same tag, allowing you to more quickly and efficiently manage your courses. From the MANAGE COURSES screen, you can sort using tags by simply clicking the tag name. Your courses table will automatically sort and display all courses that have the same tag:
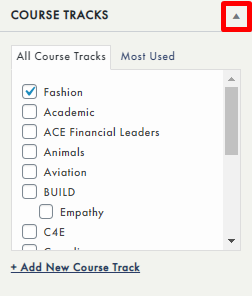
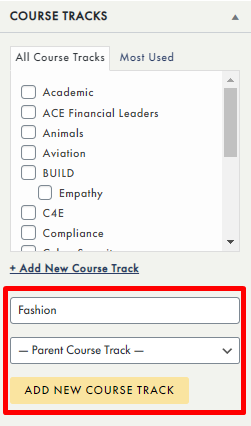
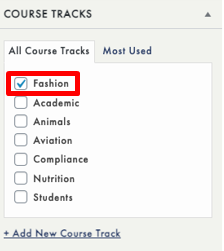
COURSE TRACK PANEL
Course Tracks are an LMS Manager role (Premium or Enterprise accounts), which features more editing rights than the Instructor role (Pro account). The Instructor role has fewer permissions, Instructors will not add or manage Course Tracks.
- Course Tracks have both notification and engagement triggers attached to them. This means that you can, for example, award a certificate upon completion of all courses within a track.
Notification and engagement triggers are covered in the Engagement section
- A course track may also be configured as a prerequisite for another course, allowing you to ensure that your students complete several courses defined by the track before beginning a new course.
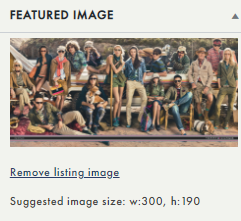
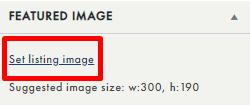
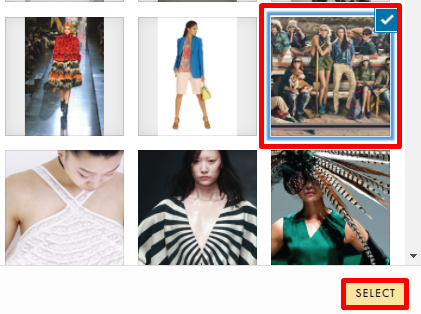
FEATURED IMAGE PANEL
The featured image in the EDIT COURSE SETTINGS page is the thumbnail image that will be displayed for this course on student’s’ dashboards.
COURSE BUILDER PANEL
The Course Builder panel provides easy access to the Course Builder, which allows you to manage your course structure and Table of Contents (TOC).
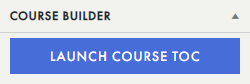
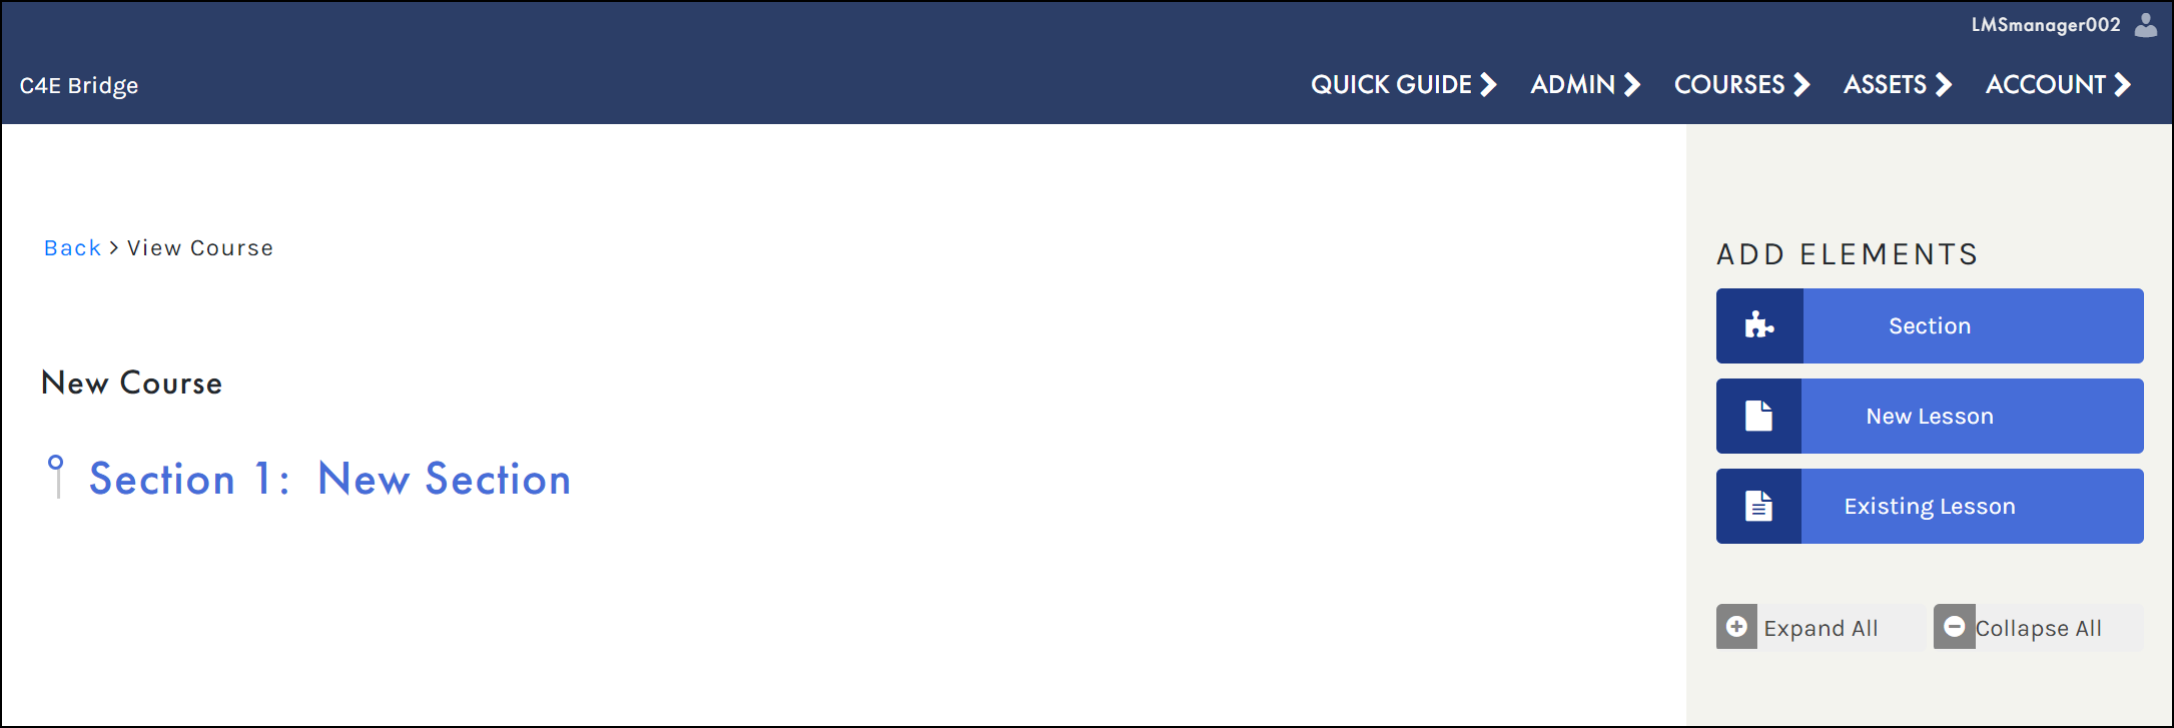
Learn more about how to create a table of contents (TOC) in the Course Builder section.