Tutorials
- USER GUIDES & VIDEO TUTORIALS
- ALL VIDEO TUTORIALS
- OVERVIEW
- ASSETS
- CREATE COURSE
- Getting Started with Creating Courses
- Create Course - Course Settings
- Course Builder (TOC)
- Get Started with Course Builder
- Sections and Lessons
- Add an Assignment
- Grading Assignments
- Create a Quiz
- Types of Quiz Questions
- Build Lessons
- Tool Settings
- Row Effects
- MANAGE COURSES
- MANAGE TEMPLATES
- MANAGE XAPI
- ADMIN
- ACCOUNT
Add an Assignment
QUICK START VIDEO TUTORIAL

2.27
ADD AN ASSIGNMENT
OVERVIEW
- Verify actions that learners have taken
- Provide instructor feedback on an action/assignment
- Prevent forward progress until specific actions are taken
- Prevent forward progress until specific actions are taken and graded
CREATE A NEW ASSIGNMENT
TYPES OF ASSIGNMENTS
OVERVIEW
When adding a new assignment to a lesson, you can choose from the following three types:- Task List: A task or task list that needs to be completed and checked off to complete the lesson
- Essay: A long answer requirement
- Upload: An upload requirement
TASK LIST ASSIGNMENTS
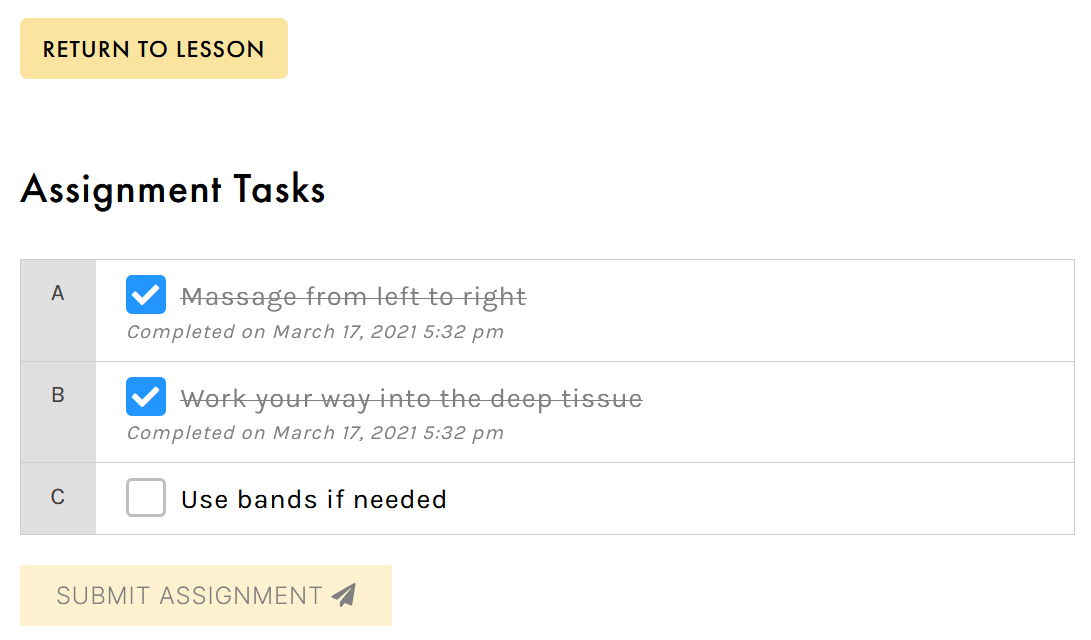
With task list assignments, you can create single or multiple item checklists to be completed by learners before they are able to complete the lesson associated with this assignment. Task list assignments guide learners into completing specific actions (including supplementary actions) taken outside the course. In doing so, task lists hold your learners accountable and show them exactly what needs to be achieved in order to get results. To create a new Task List assignment:-
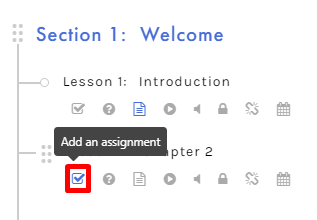
- From the Course Builder (TOC) window, hover over the desired lesson title and select the ADD AN ASSIGNMENT icon:
- From the Course Builder (TOC) window, hover over the desired lesson title and select the ADD AN ASSIGNMENT icon:
 To learn more about accessing the COURSE BUILDER window, visit the Course Builder section.
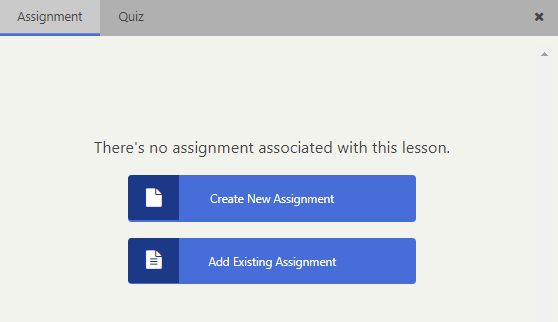
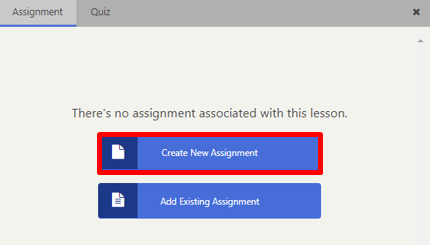
- A side panel will appear to the right of the screen, allowing you to create a new assignment or add an existing one. Click CREATE NEW ASSIGNMENT:
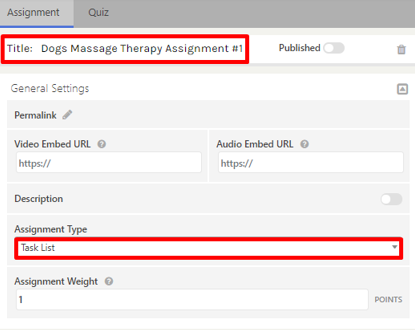
- Enter your assignment Title in the TITLE field and select TASK LIST from the ASSIGNMENT TYPE dropdown menu:
- If desired, you may toggle on and add an optional DESCRIPTION for this assignment (i.e., assignment prompt):
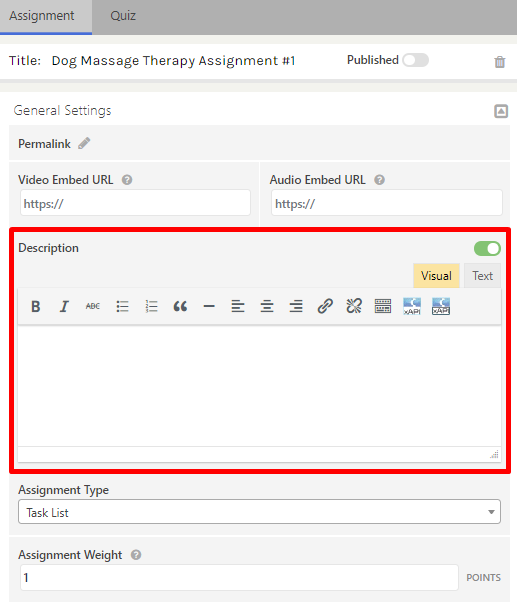
- Click ADD TASK to begin adding your tasks:
To delete any tasks, you can click the TRASH icon to the right.
- Once you have added all tasks, you can adjust the assignment weight, then publish by toggling the PUBLISHED button in the top right to ON (once on, this will turn green):
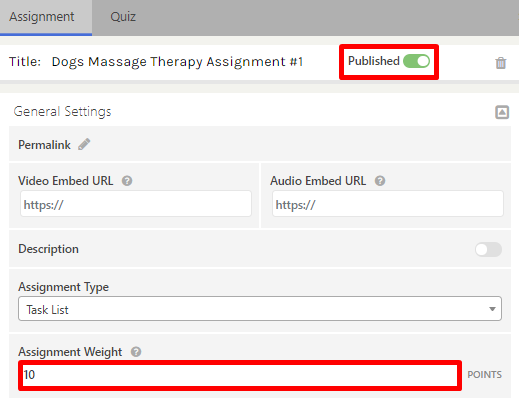
- Once your assignment has been published, click SAVE CHANGES to save.
 To return to the Course Builder TOC select the ‘x’ in the upper right corner.
 The Exit button will take you back to the MANAGE COURSES screen.
STUDENT VIEW
When the learner accesses the lesson containing this assignment, they will see a START ASSIGNMENT button: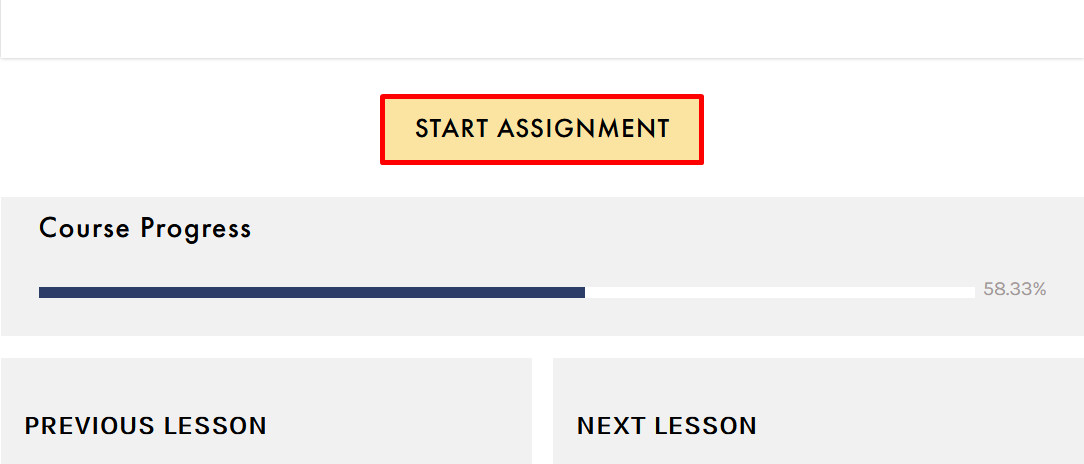

UPLOAD ASSIGNMENTS
Upload assignments require your students to upload file submissions, such as PDFs, photos, or videos. To Create a New Upload Assignment:-
- From the Course Builder (TOC) window, hover over the desired lesson title and select the ADD AN ASSIGNMENT icon
- From the Course Builder (TOC) window, hover over the desired lesson title and select the ADD AN ASSIGNMENT icon
 To learn more about accessing the COURSE BUILDER window, visit the Course Builder section.
-
- A side panel will appear to the right of the screen, allowing you to create a new assignment or add an existing one. Click CREATE NEW ASSIGNMENT
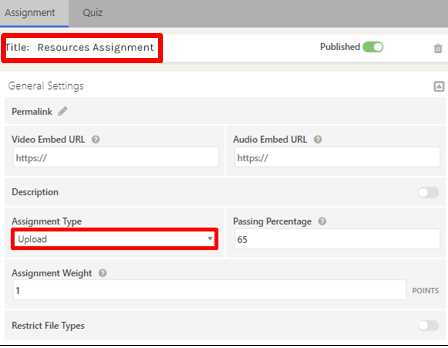
- Enter your assignment title in the TITLE field and select UPLOAD from the ASSIGNMENT TYPE dropdown menu:
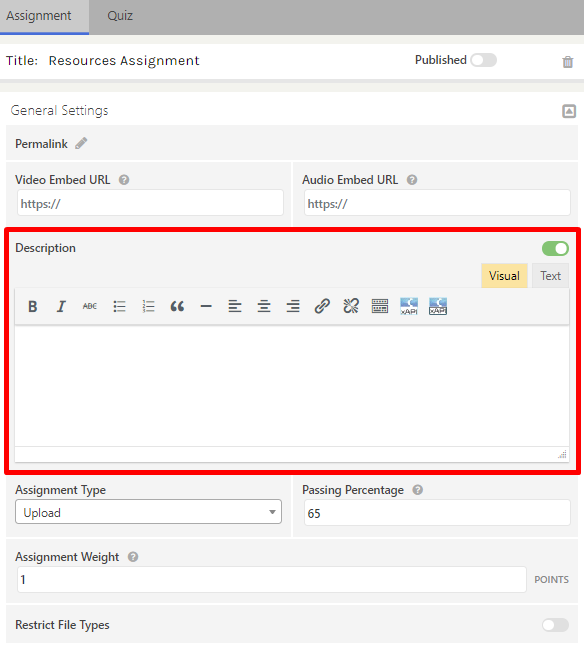
- If desired, you may toggle on and add an optional DESCRIPTION (i.e., assignment prompt) for this assignment:
- If desired, you may toggle on and add an optional RESTRICT FILE TYPES setting:
To limit the accepted file types for this assignment, browse through the list of available file formats and click to select (you may also type in the search field to quickly search/add a specific item):
You can select as many file types as you’d like.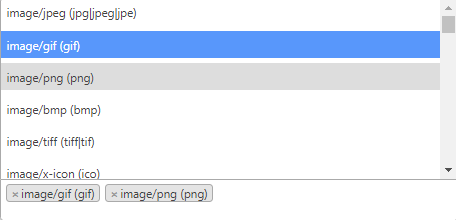
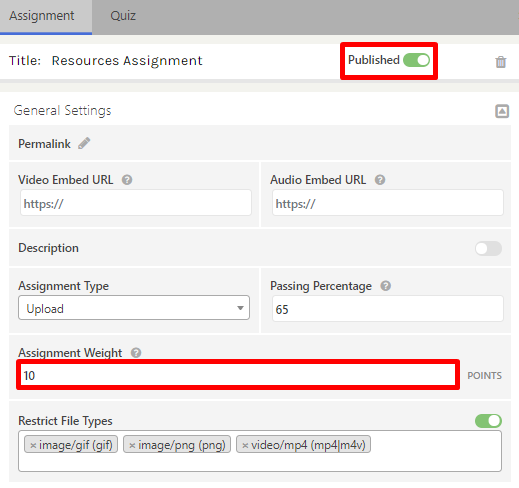
- Once all other changes are complete, you can adjust the assignment weight, then publish by toggling the PUBLISHED button in the top right to ON (once on, this will turn green):
- Once your assignment has been published, click SAVE CHANGES to save.
- A side panel will appear to the right of the screen, allowing you to create a new assignment or add an existing one. Click CREATE NEW ASSIGNMENT
To return to the Course Builder TOC select the ‘x’ in the upper right corner.
The Exit button will take you back to the MANAGE COURSES screen.
STUDENT VIEW
When the learner accesses the lesson containing this assignment, they will see a START ASSIGNMENT button:
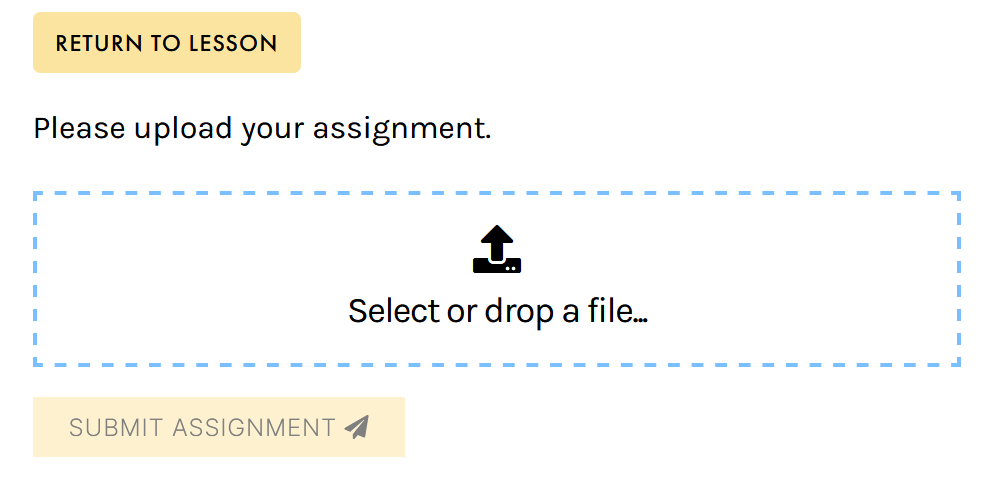
By default, the maximum allowed file size when uploading files is 100 MB. For larger files, students will need to either zip the file, or compress the file using Media Encoder (or any other file compression tool).
Learners may only upload one file per assignment submission. To upload multiple files at once, they will need to compile these into a zip file to upload. A zip file is a folder containing multiple files that has been “zipped” or compressed into one file.
To review how to grade assignments, view the article.
ESSAY ASSIGNMENT
Essay assignments help reinforce learning from the lesson content by having your students write essays. This may be especially helpful in writing courses, allowing you to create and grade essay-based assignments directly from C4EBridge. To create a new essay assignment:-
- From the Course Builder (TOC) window, hover over the desired lesson title and select the ADD AN ASSIGNMENT icon:
- From the Course Builder (TOC) window, hover over the desired lesson title and select the ADD AN ASSIGNMENT icon:
To learn more about accessing the COURSE BUILDER window, visit the Course Builder section.
-
- A side panel will appear to the right of the screen, allowing you to create a new assignment or add an existing one. Click CREATE NEW ASSIGNMENT:
- Enter your assignment Title in the TITLE field and select ESSAY from the ASSIGNMENT TYPE dropdown menu:
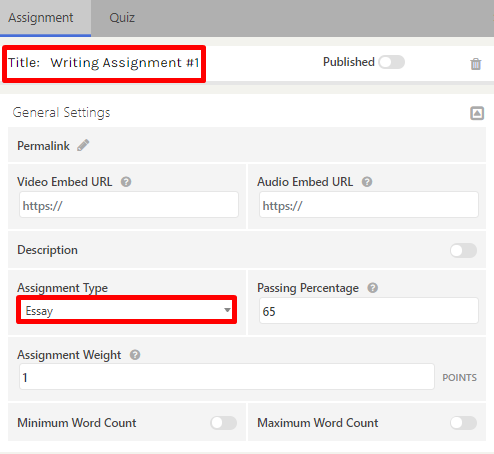
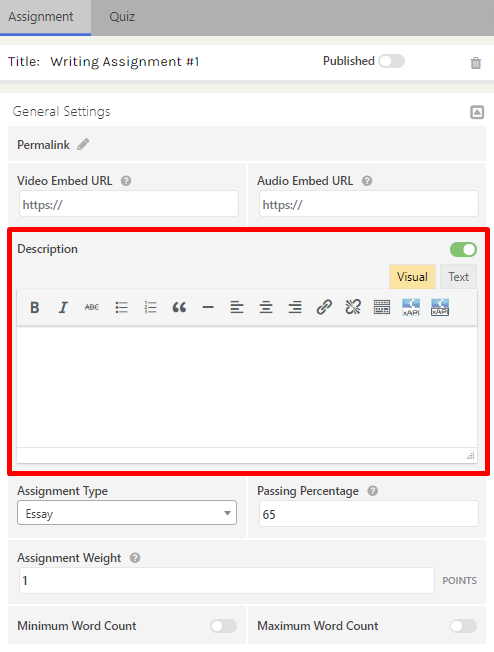
- If desired, you may toggle on and add an optional DESCRIPTION for this assignment (i.e., assignment prompt):
- If desired, you may set a minimum and maximum word count for this assignment:

- Once all other changes are complete, you can adjust the assignment weight, then publish by toggling the PUBLISHED button in the top right to ON (once on, this will turn green):

- Once your assignment has been published, click SAVE CHANGES to save.
- A side panel will appear to the right of the screen, allowing you to create a new assignment or add an existing one. Click CREATE NEW ASSIGNMENT:
To return to the Course Builder TOC select the ‘x’ in the upper right corner.
The Exit button will take you back to the MANAGE COURSES screen.
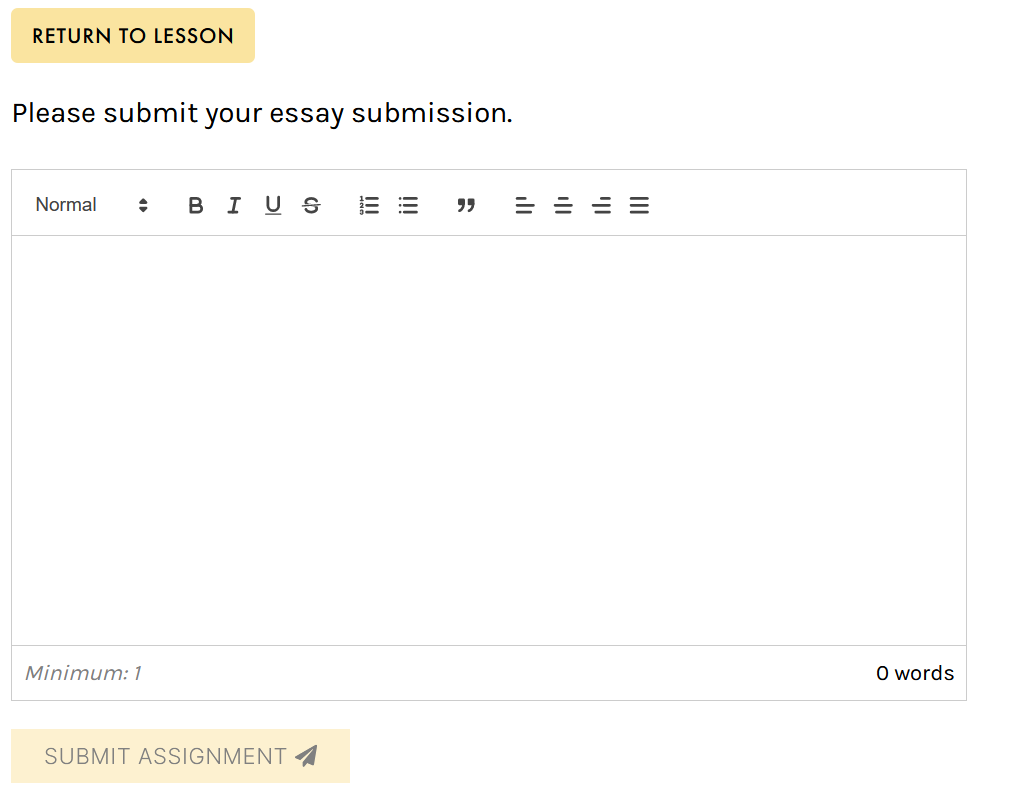
STUDENT VIEW
When the learner accesses the lesson containing this assignment, they will see a START ASSIGNMENT button:
To learn how an instructor grades assignments and students receive notifications view the article.
UPDATE ASSIGNMENTS
-
- Expand the lesson containing the assignment you wish to edit:
- Expand the lesson containing the assignment you wish to edit:
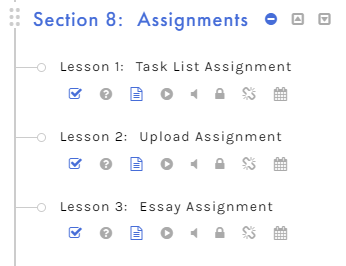
Lessons with assignments attached to them will have blue checkmark icons (gray icons indicate that there are no assignments).
-
- Select the EDIT ASSIGNMENT tool (checkmark icon):
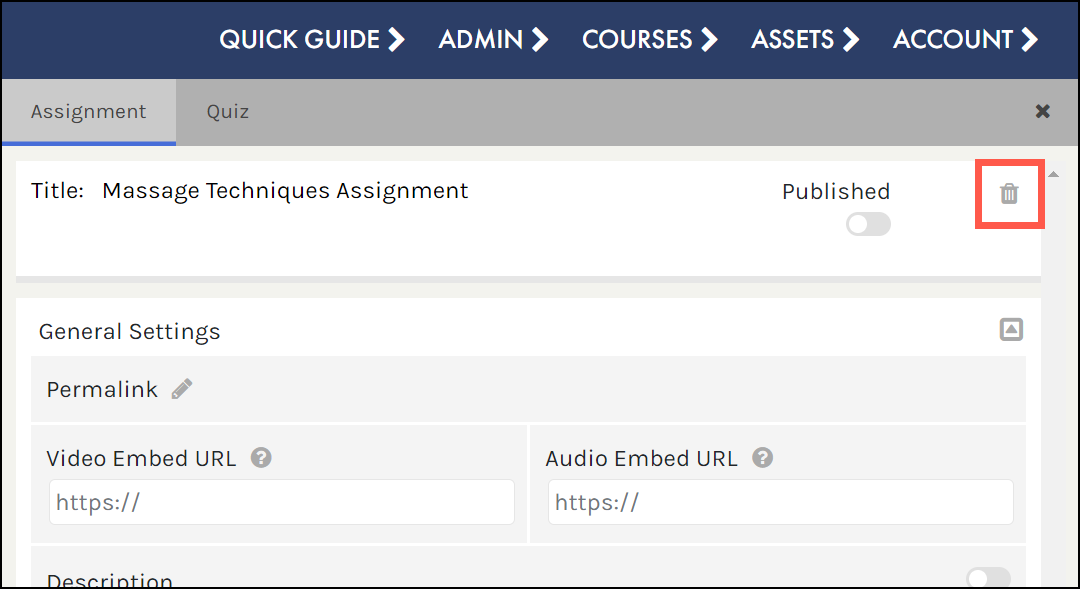
This will open the ASSIGNMENT EDITOR to the right of the Course Builder window: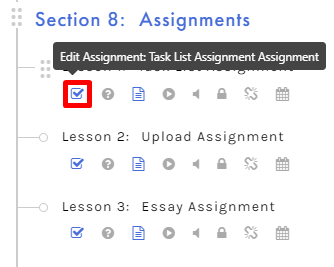

- Make any desired changes to your assignment, then click the SAVE CHANGES button to save your updates.
- Select the EDIT ASSIGNMENT tool (checkmark icon):
To return to the Course Builder TOC select the ‘x’ in the upper right corner.
The Exit button will take you back to the MANAGE COURSES screen
DELETE ASSIGNMENTS
- Expand the lesson containing the assignment you wish to delete:
- Select the EDIT ASSIGNMENT tool (checkmark icon):
This will open the ASSIGNMENT EDITOR to the right of the Course Builder window. - Click the TRASH icon (top right corner) to delete this assignment:
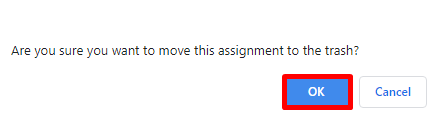
- On the confirmation window, click OK to delete this assignment:
DETACH ASSIGNMENTS
- Expand the lesson containing the assignment you wish to delete:
- Select the EDIT ASSIGNMENT tool (checkmark icon):
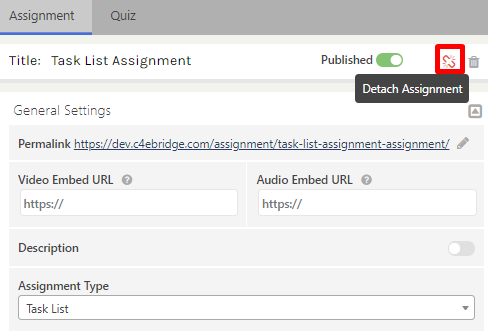
This will open the ASSIGNMENT EDITOR to the right of the Course Builder window. - Click the DETACH ASSIGNMENT icon (top right corner) to detach this assignment:
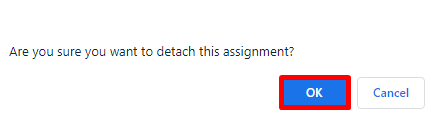
- On the confirmation window, click OK to detach this assignment:
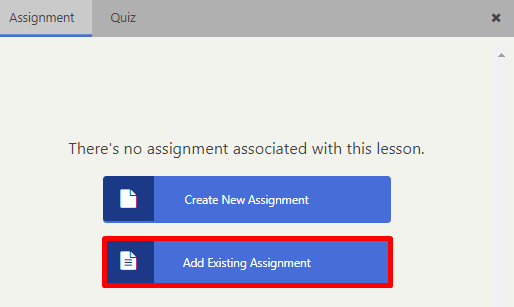
ADD EXISTING ASSIGNMENT
- From the Course Builder (TOC) window, hover over the desired lesson in which you wish to add a cloned/detached assignment, and select the ADD AN ASSIGNMENT icon:
- A side panel will appear to the right of the screen, allowing you to create a new assignment or add an existing one. Click ADD EXISTING ASSIGNMENT
- Use the search bar to browse through the list of assignments or type to search for a specific assignment. To the left of the search results, you will see either the CLONE function (indicating an assignment is already attached to another lesson, and can be duplicated) or the ATTACH function (indicating an assignment is detached and not associated with any other lessons):
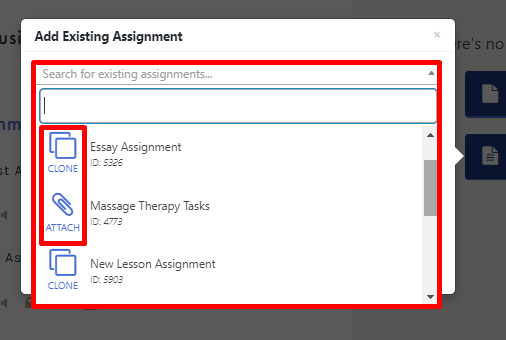
- Click either CLONE or ATTACH to add this assignment to your current lesson.
- This assignment will populate/display in the ASSIGNMENT EDITOR window. If necessary, make any desired changes to the assignment, then click the SAVE CHANGES button to save your updates.
- To exit the editing window, click EXIT to return to the MANAGE COURSES table, or click the X icon (top right corner) to return to the Course Builder.