GETTING STARTED WITH CREATING COURSES
QUICK START VIDEO TUTORIAL
Watch this short video, and start mastering the basics of creating a course:
MY COURSES
Let’s get you started with adapting the mini course with the prebuilt templates that come with C4E
Bridge.
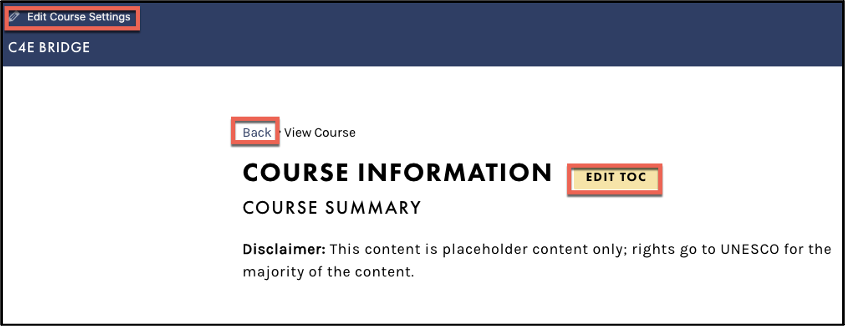
- In the top navigation Go to My Courses

- Select the VIEW COURSE SUMMARY button.

This takes you to the page that provides the course title and description that was added in the Courses > Manage Courses > Create Course > Edit Course Settings (to quickly return to it use the link in top right)
 To learn about Course Settings or watch the videos
From the
Course Information page, you can also access the
Course Builder (
EDIT TOC button). Do not select this just yet, we’ll cover this after you view the pre-existing mini course.
First, let’s preview the mini course.
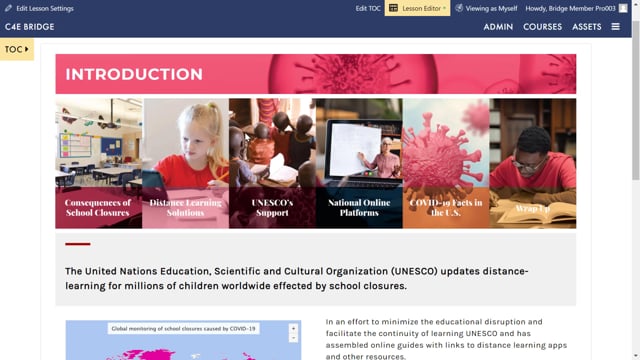
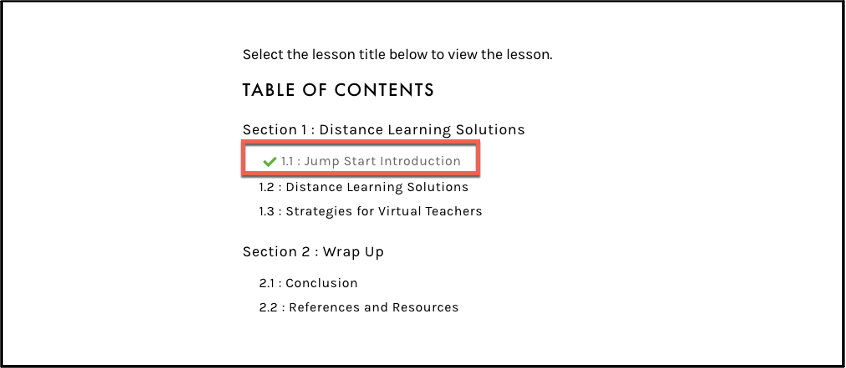
- Under the TABLE OF CONTENTS select the first lesson title ‘Jump Start Introduction’
This takes you to the first lesson in
Preview mode.

- At the bottom of each lesson page is a NEXT and PREVIOUS button. When you are in Preview mode, you can use these to navigate forward and backward one page at a time.
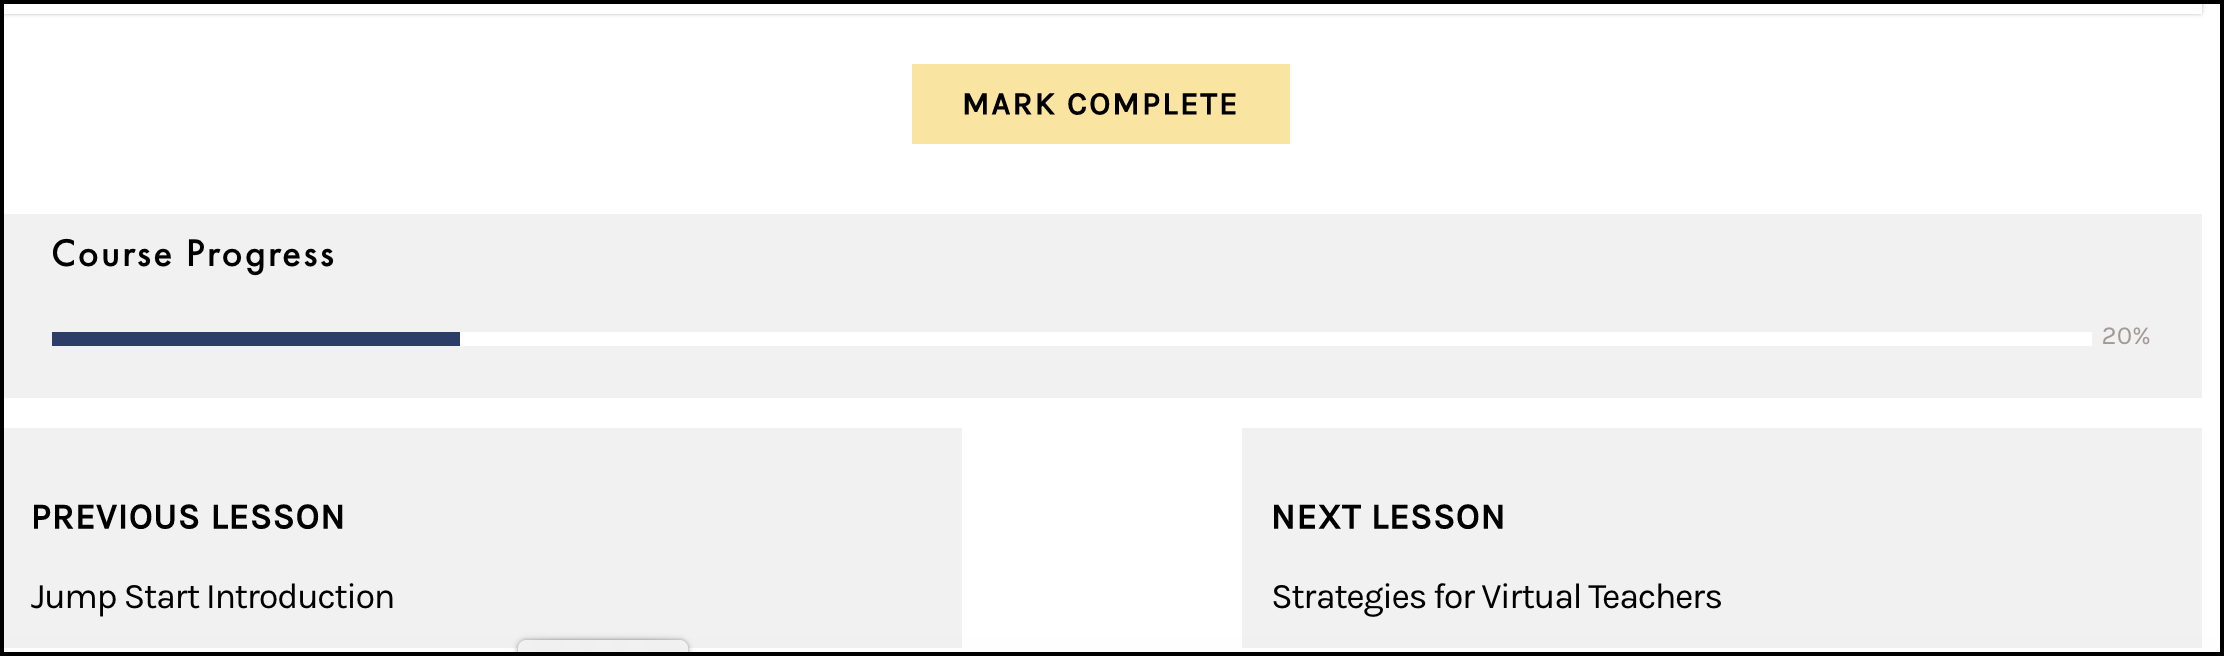
Your students will select the MARK COMPLETE button to view their Course Progress.
The
TOC button (in the top left of lesson pages) is expandable and automatically contracts and expands each section dynamically according to where the learner is in the course. Students can use this
TABLE OF CONTENTS to navigate to any lesson and it shows progress through the course with color differentiators and check marks.

Go ahead and explore this course navigating from page to page. Take note of the various elements on each page such as text, images, quotes, buttons, an accordion, and an embedded video.
 This mini course is a very short sample of a few of the elements in C4EBridge. it is by no means a complete course or shows all the features of all the tools that are possible in C4EBridge.
If you can image it, you can probably do it in C4EBridge!
This mini course is a very short sample of a few of the elements in C4EBridge. it is by no means a complete course or shows all the features of all the tools that are possible in C4EBridge.
If you can image it, you can probably do it in C4EBridge!
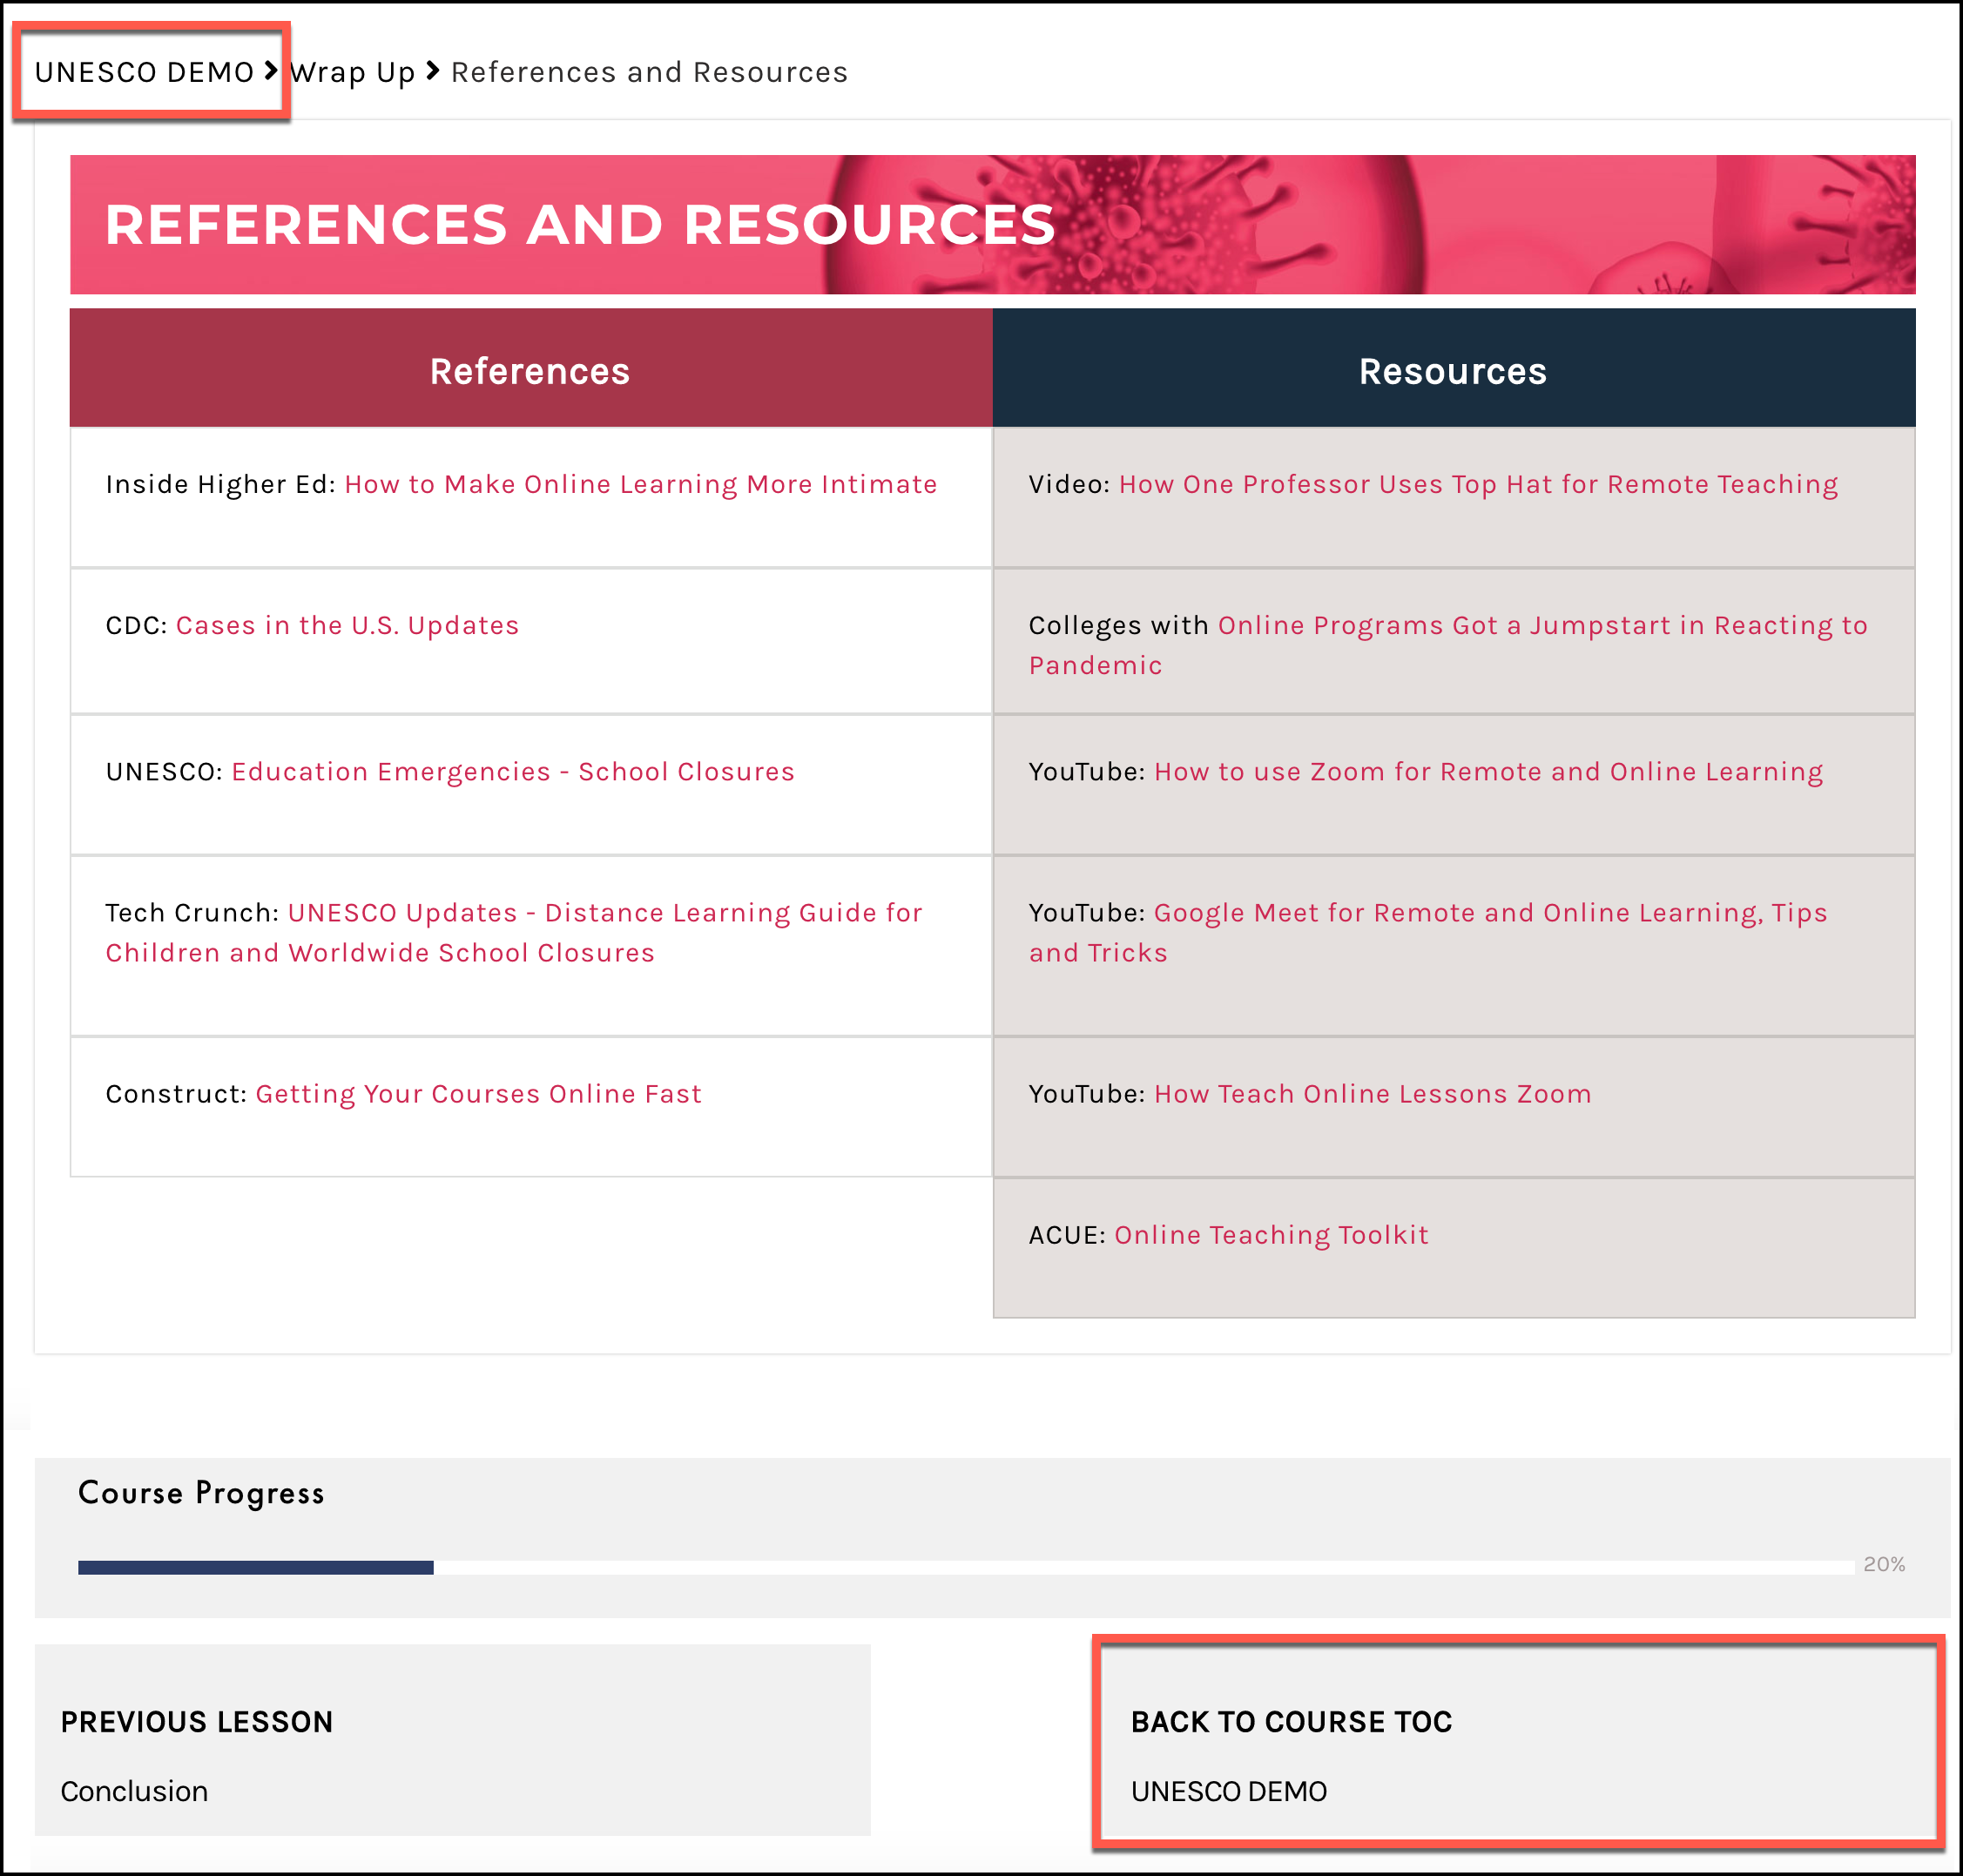
When you’re done exploring the mini course you can return to the Course Summary page one of two ways, either use the
breadcrumb trail (at the top of the page) to return to the
Course Summary page or if you are on the last page of the course, which in this case is the
References page, you can use the
RETURN TO COURSE TOC button at the bottom of the page.
Now, you’ll learn how to add another section and lesson to this course.
- From the Course summary page, select EDIT TOC button.
COURSE BUILDER – TABLE OF CONTENT
C4E
Bridge Course Builder (TOC) allows you to manage the structure and outline of your courses. From the Course Builder (TOC) you can create new sections and lessons, manage their order, and edit their titles. You can also delete lessons and sections and attach or detach existing lessons.
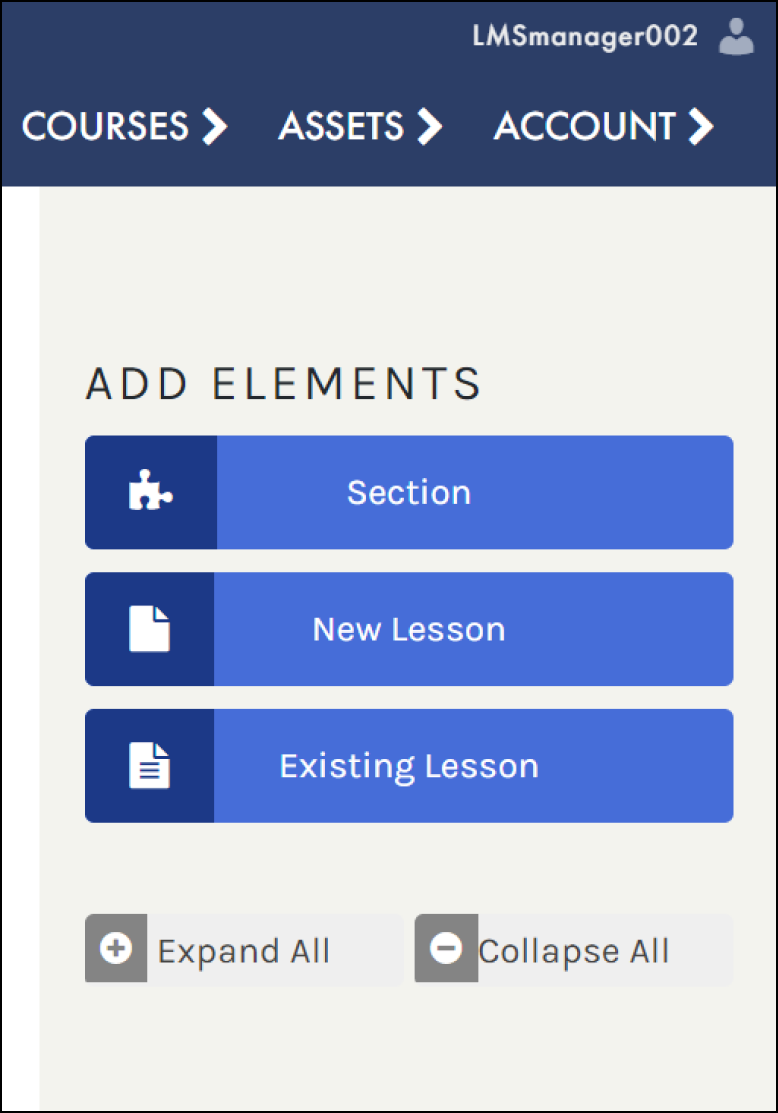
To add Sections and Lessons: On the right side of the screen under
ADD ELEMENTS:
- Select (or drag) the Section button to add a Section
- Change the name of the Section by putting your mouse in the title and typing
- Select the New Lesson button (or drag) to add a lesson
- Change the name of the lesson – put your mouse in the title and start typing
Add as many sections and lessons as you like and feel free to move them around by dragging the handles or using the up/down arrows.
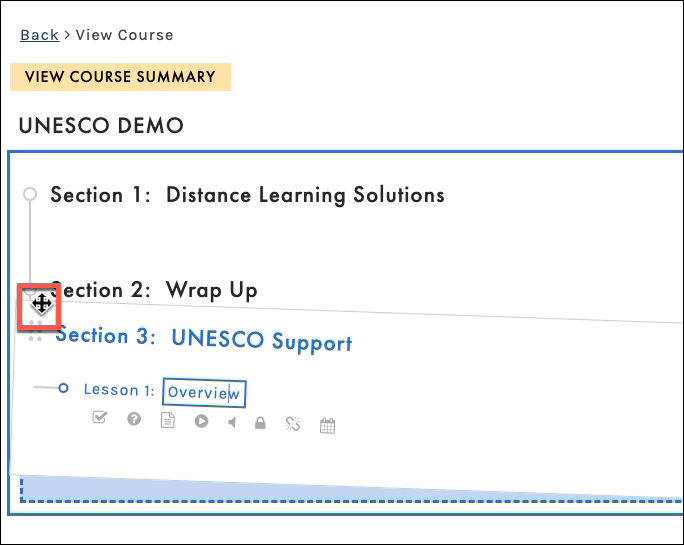
- Add a new section and name it: UNESCO support
- Add a new lesson and name it: Overview
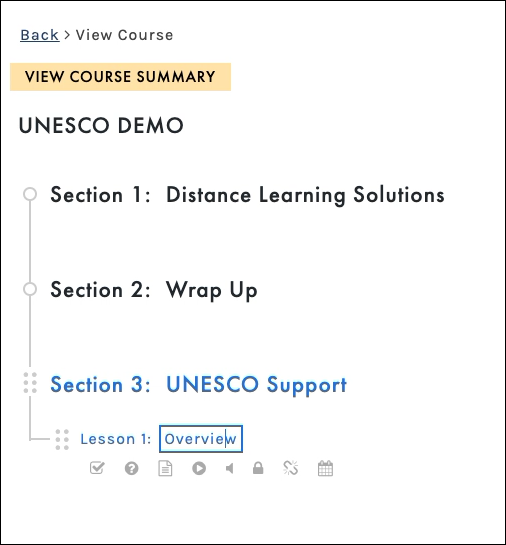
- Move the Section above the Wrap up section by selecting the dots on the left and clicking and dragging the section up.
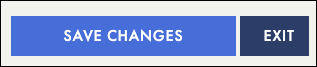
- Select the Save button (blue button in bottom right)
- After the Save is complete, roll your mouse over the title to view the set of icons and select OPEN LESSON SETTINGS icon
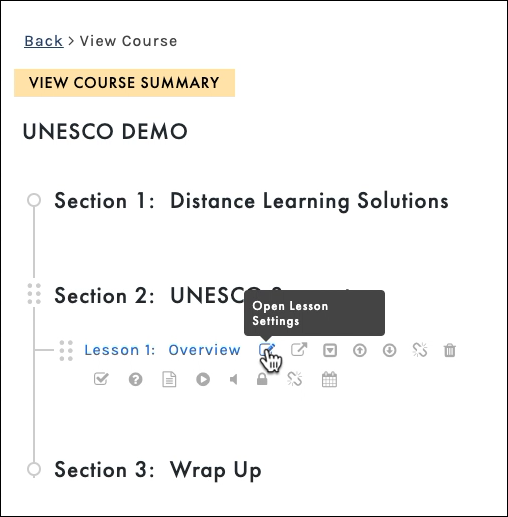
 The Edit Lesson Setting opens in a new tab.
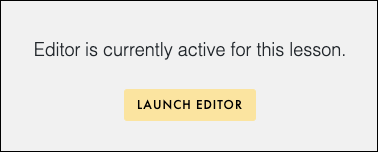
- Select the LAUNCH EDITOR button. This will open the page in Edit mode
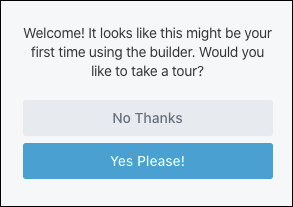
And the first time you enter this page you will be asked to take a quick tour; we recommend you take the tour!
View these videos and article on creating the Course Builder (TOC):
LESSON EDITOR
On the
Lesson Editor page, you should be in
Edit mode, you’ll know if you are because you will see a note at the top of the page that states
“YOU ARE IN EDIT MODE” if you do not see that select the
LESSON EDITOR button at the top of the page.
- Select the Plus sign (+) icon on the upper right side to start adding content to your lesson.
It is easy to adapt a template so let’s start there and then modify it.
- Select the TEMPLATES tab.
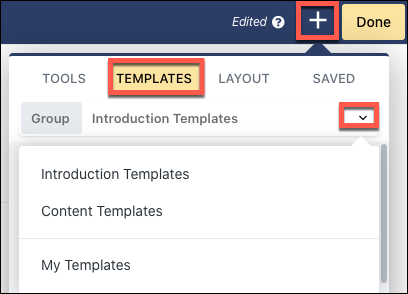

Choose a different template type in the Group field to view the Content Templates. Introduction Templates are a good place to start for a welcome page and/or a transition page. My Templates are the templates that you save and can repurpose in other lessons and/or courses.
- Select Introduction Templates.
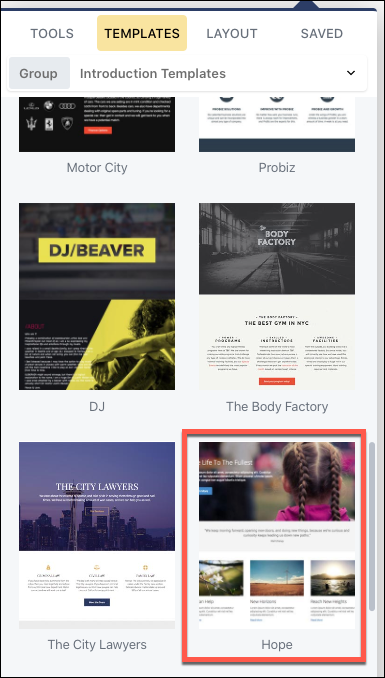
- Scroll down and select the Hope template.
A popup will appear asking you what you want to do!
Replace Existing Layout will replace everything on the page.
Append New Layout means that it will add the template below the content you already have on the page,
- Select Replace Existing Layout.
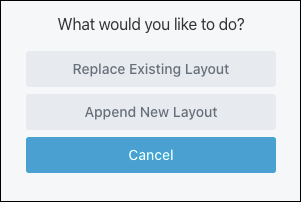
- Then click OK to confirm your choice
Page Elements
Scroll down the page and roll your mouse over the elements on the page, you should notice that there are three rows and within each row there are multiple columns and various tools such as a heading, text buttons, and callouts.
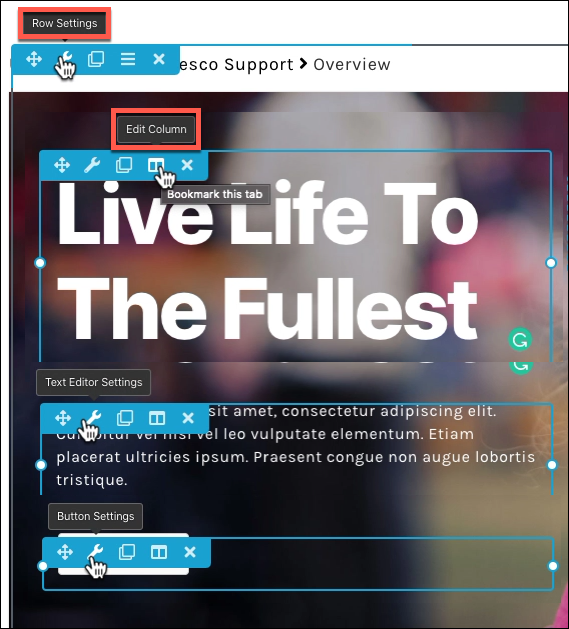
 There is blank container in the first row on the right, this is strategically placed, it is meant to keep the other containers on the left side of the page (if the blank container is removed, the text will cover the entire page, covering the back of the girl’s head). These containers are responsive so that page assets and elements look good on any size device.
EDIT THE TEMPLATE
Background Image

You must have images in your
Image library in order to complete add a background image into a Row. If you have not completed the first section of this tutorial and do not have images in your asset library, select the DONE button in the top right corner and
SAVE DRAFT. Then, go to the
Image article to learn how to upload images into your asset library. Or visit these
video tutorials. Then return to the course by following the instructions from the
Edit a Course section of this article.
- Select the Row Setting of the top container.
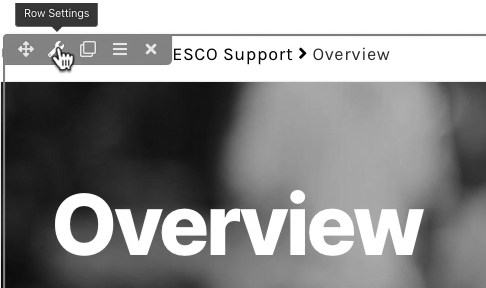
You will be in the
Style Tab > Scroll down until you see
Background Photo > Photo
- Select Remove, then select Select Photo.
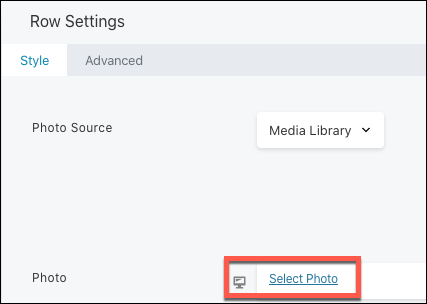
- From your Media Library select the image you want as your background then use the Select Photo button (bottom right) to confirm.
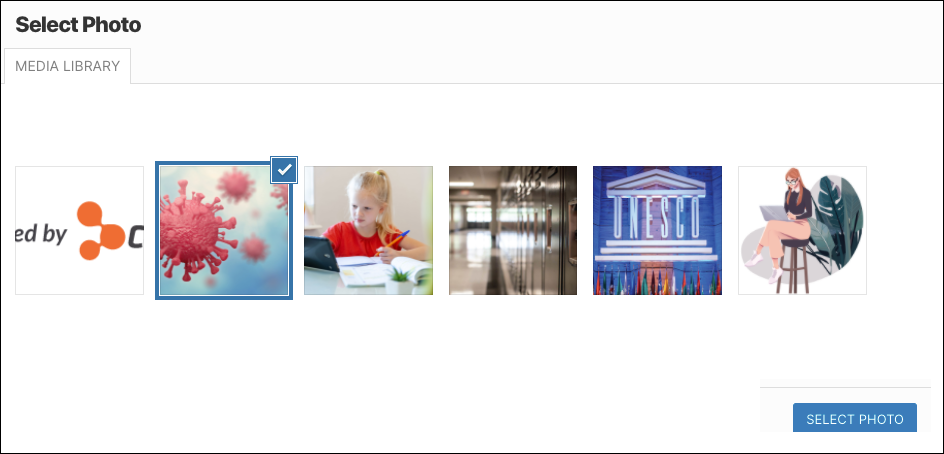
If the images do not automatically populate, try selecting
Media Library (upper right). If you still do not see any images in your media library that means you did not upload any in your
Image Assets library. Select the
DONE button in the top right corner and then Publish. Then, go to the
Image article to learn how to upload some images. Or visit these
video tutorials.
A thumbnail will appear in the
Row Settings.

You may want to add a background overlay so that you can view the text clearly. In the Style tab scroll down until you see Background Overlay.
Select a color and use the transparency scroll bar to create some opacity.

- Select Save (bottom right)
Heading
Let’s change the text in the heading.
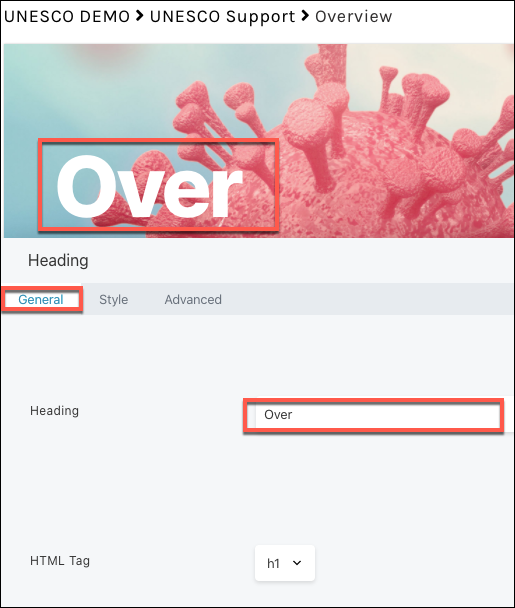
- Roll your mouse the first heading and select Heading Settings.
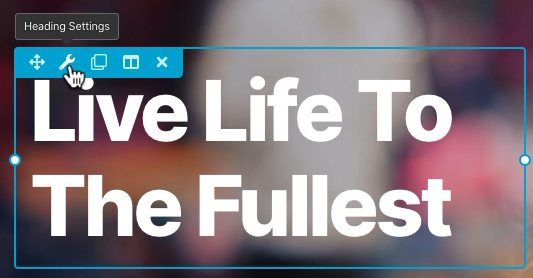
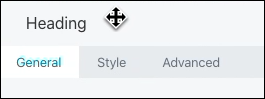
The first time you open a Settings panel you will be in the
GENERAL Tab.
Drag the Settings container below the header by rolling your mouse over the top part of the container until you see a four headed arrow and then click and drag it.
The changes you make happen in real-time; thus, as you type you will see the changes happening on the screen. Type in the
Heading field:
Overview
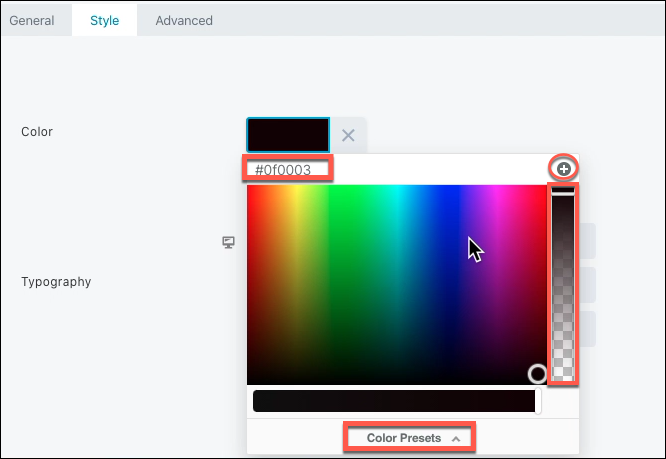
Depending on your background image colors, you may need to change the font color. If so, go to the
STYLE tab select the
Color box and choose your color.
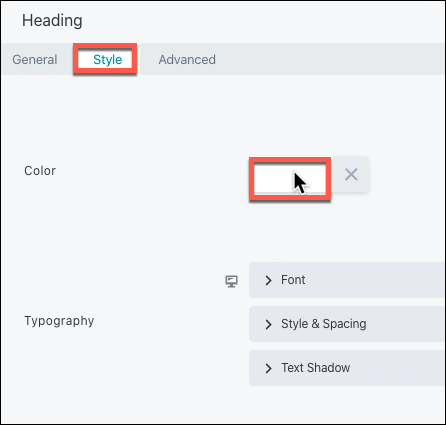
From the color box you can type in your hex color code, you can add (+) a color to your Color Presets (or expand the color presets to choose a color you have previously added) and you can change the transparency of the color by using the slider on the right.
- Select the SAVE button in the button right.
C4EBridge properties remembers the last setting you were on and will open in whichever tab you were on last. Thus, if you exit while in the STYLE tab, when you open another settings panel the next time, it will open in the STYLE tab.
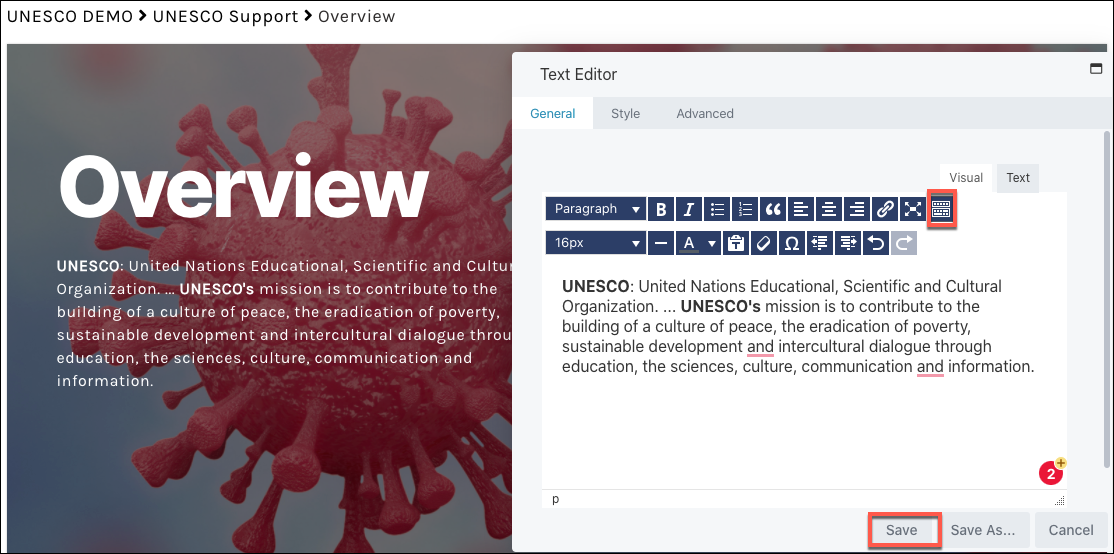
Edit Text
Roll your mouse over the text container and add your Overview text.
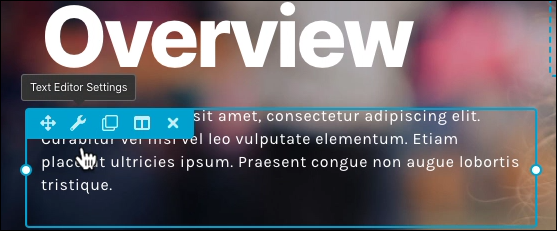
- Type or copy/paste your text in the General tab field, feel free to expand the toll bar toggle and make any changes you like in the Style tab and then select the Save button.
Remove a Container
In this case, we don’t really need the button so let’s delete it.
- Roll your mouse over the button container and select the X icon.
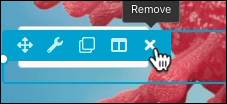
- Then select the OK button to confirm you deletion.
Continue to make any other desired changes to the remaining rows and columns.
All of the rows, columns, tools, and elements have some of the same features but depending on what it is may have more or less tabs, choices, and various settings.
To view a full description of the various tools and elements settings, view the User Guides.
USE PREBUILT LAYOUT TO ADD CONTENT
A Template is used in C4E
Bridge as something that either replaces or appends the current content. Prebuilt rows, on the other hand, are smaller than Templates but serve a similar function—they are quick layouts that you can customize. You can choose from dozens of prebuilt rows to add to your layout and modify as you like.
- With the Add Content Menu open, select the LAYOUT tab.
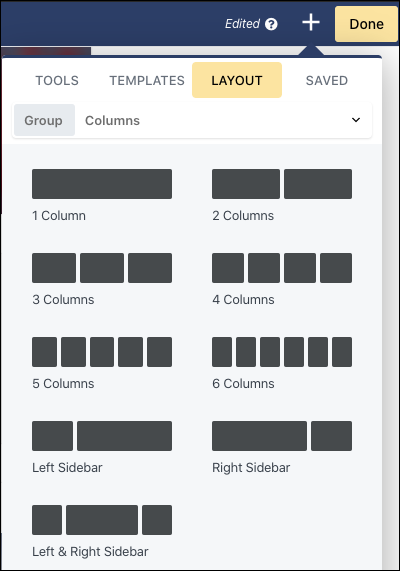
From here you can add a blank row, but to access prebuilt rows
- On the Group > Columns select the dropdown, then select Prebuilt Rows.
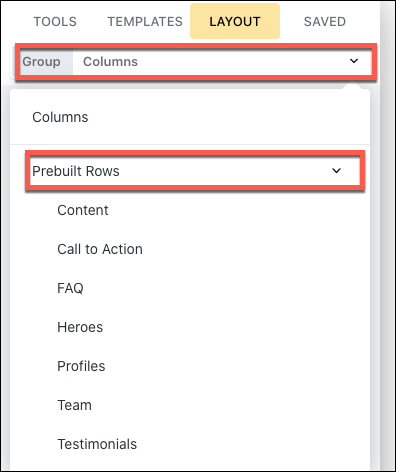
Select Content, Call to Action, FAQ, Heroes, Profiles, Team, or Testimonials to view the various prebuilt layouts.
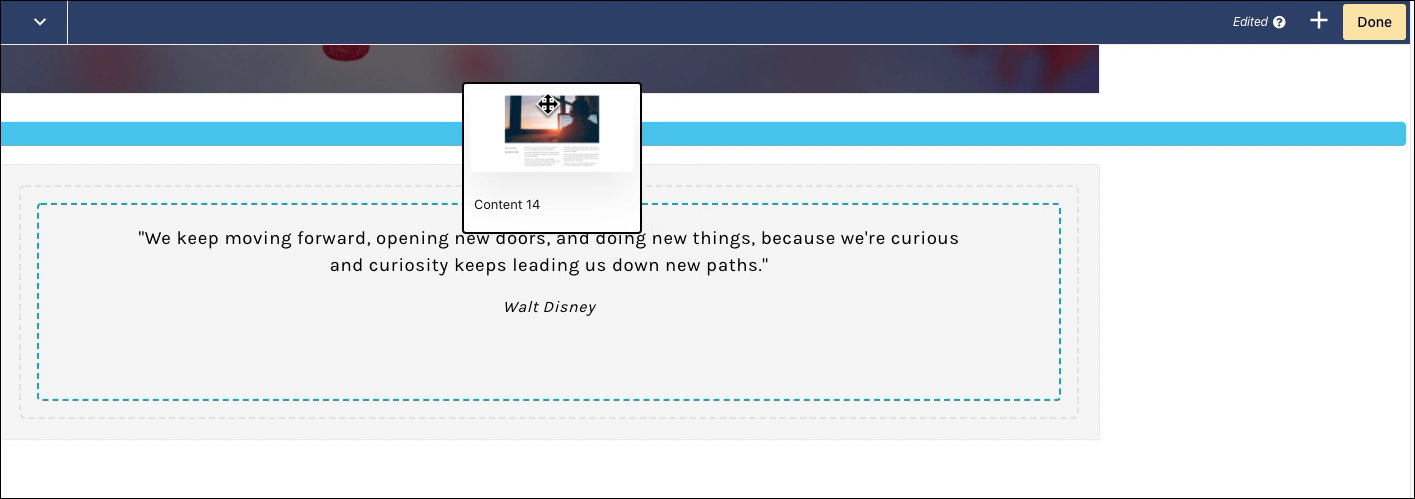
Unlike Templates that you click and Append or Replace layouts, with prebuilt layouts you physically click and drag them onto the page until you see a blue line on the page (above or below another row) and then drop it.
 These layouts are Rows. You can drag rows between any other row but not inside another row. However, you can drag columns and tools inside a row. To view more articles on the difference between rows and columns view the User Guides.
Drag any layout onto the page and notice that it is a row with multiple columns inside it.
Then you can roll your mouse over the elements in the layout and select the Settings to edit the content. Continue to edit content as desired.
TOOLS
It’s easy to add assets and page elements inside any row or column. You can either add the assets you have pre-uploaded or you can search the web while you are adding assets and add assets without ever leaving the page.
Let’s add a video. With the Add Content menu open select the
TOOLS tab.
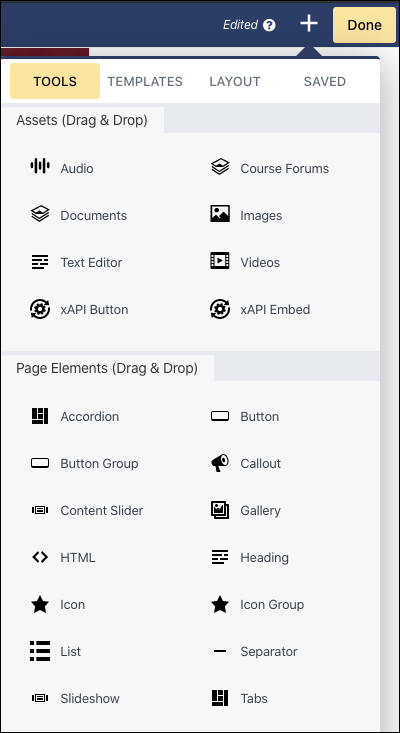
- Under Assets, roll your mouse over video and click and drag it onto the screen, drop it where you see a blue line within the page that you feel would be a good place for your video.
- When you release your mouse the Videos panel automatically opens.
Let’s add a video from YouTube.
- Select the YouTube tab
- Type UNESCO in the type field and select Search
- Select the video and select SAVE
For the Pro version, assets must be less than 100 MB.
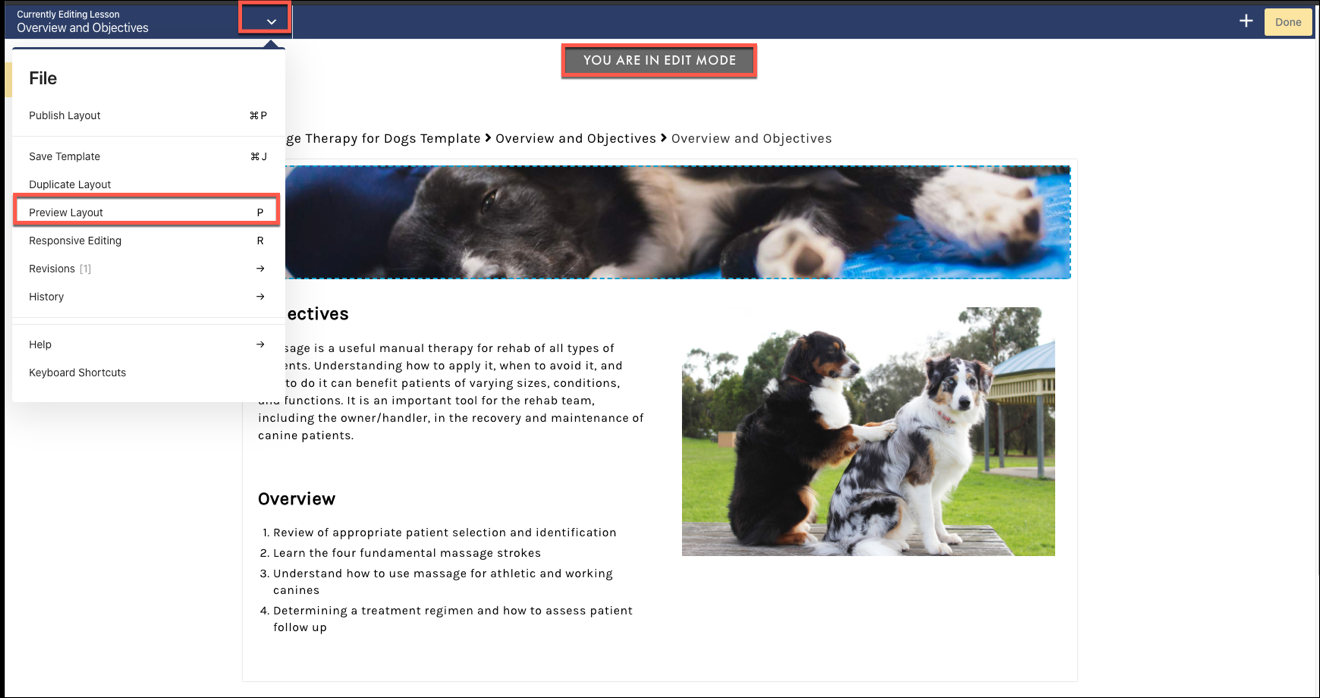
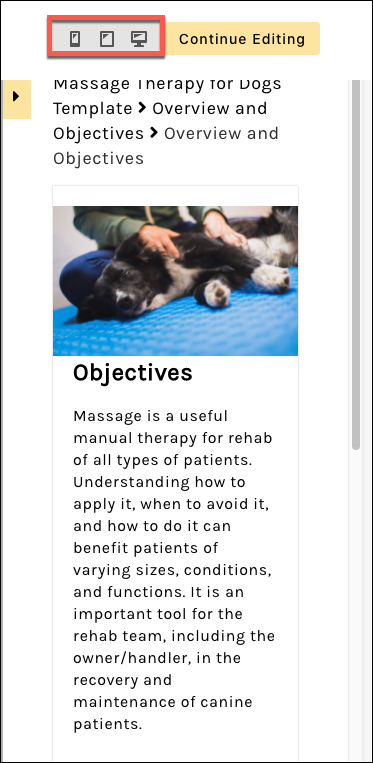
PREVIEW
If you are in
Edit Mode, you can easily preview how your course will look on different size devices by selecting
“P” on your keyboard or go to the
File dropdown and select
Preview Layout.
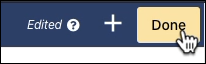
Or you can select the
DONE button and then
PUBLISH and you will be in Preview mode.

To learn more about Editing Lessons View the article and video tutorials in the Tutorials Build Lessons > Lessons